In this lab, we are going to re-create the Request for absence process using pools and messages.
- Click New icon to create a new Process Diagram. A default process with a Start and a Human task is created.
- Click on the empty space outside the process. In the General tab, rename the diagram to Request for absence with pools.
- Click inside the process, at the General→Pool menu, rename it to Student process.
- Click on the Pool icon in the Palette and click on the empty space under the Student process pool. Rename it as Director process.
- Now we create two typical users for our process, which are director and student.
- Click Organization→Open. Select MyOrganization and then Open. In Organizations Roles, add a new role and name it Student. The role Director is already defined, so no need to redefine it.
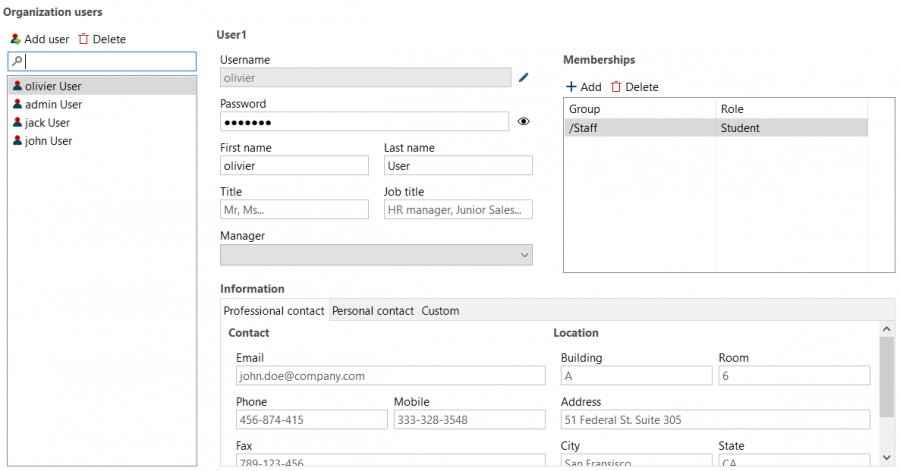
- Save the changes, then add the user olivier and password olivier. In Membership tab, click on Add membership and choose staff group and Student role. Press Ctrl+s to save.
- Don't forget to deploy the organization each time you modify it !
- Now we are going to design the process.
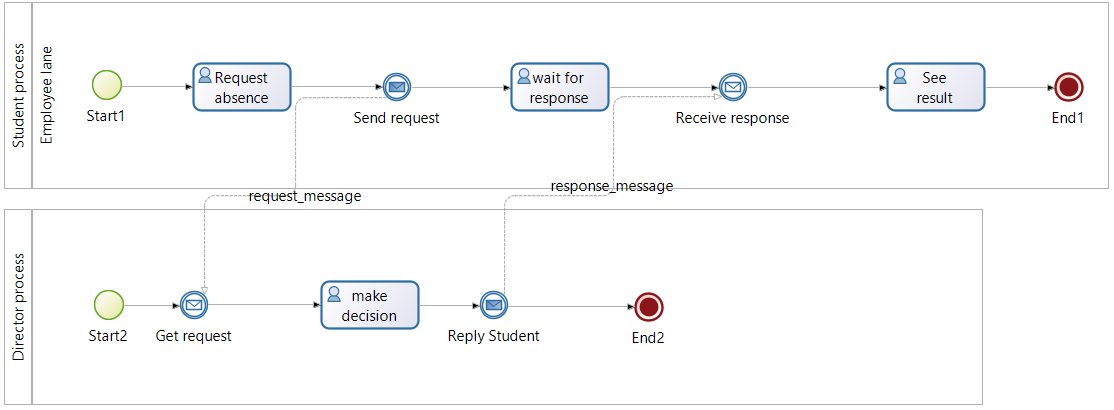
- Design and rename the activities as the following:
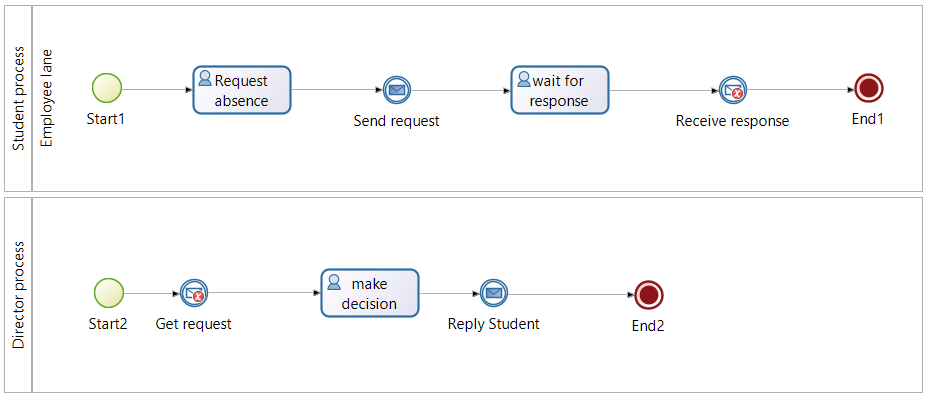
- Note that: the Send request and Reply student are Throw message events and the Get request and Receive response are Catch message events.
- Click on Student process pool, select General→Actors and add a student actor. Set it as initiator. Remove the default employee actor
- By the same way add a director actor for Director process pool.
- Click on Request absence task, select General→Actors→Use the actor below and choose student from the list.
- By the same way, select student as the actor of the Wait for response task.
- Continue the design. Click on Make decision task, select General→Actors→Use the actor below and choose director from the list.
- Click on the Student process, create four global variables:
| Name | Description | Type |
|---|---|---|
| student_name | whatever you want | Text |
| absence_date | whatever you want | Date |
| reason | whatever you want | Text |
| response | whatever you want | Text |
- Save your work (Ctrl+s). Click on the Application tab.
- Click on the Director process, create four global variables:
| Name | Description | Type |
|---|---|---|
| request_name | whatever you want | Text |
| request_date | whatever you want | Date |
| request_reason | whatever you want | Text |
| approval | whatever you want | Boolean |
- Save your work and click on the Application tab.
- Click on the Send request message, select General → Messages → Add.
- Name request_message.
- Select Target Pool Director process and target element Get request.
- In Message content, add three variables:
| Name | Default value |
|---|---|
| name_in_message | student_name |
| date_in_message | absence_date |
| reason_in_message | reason |
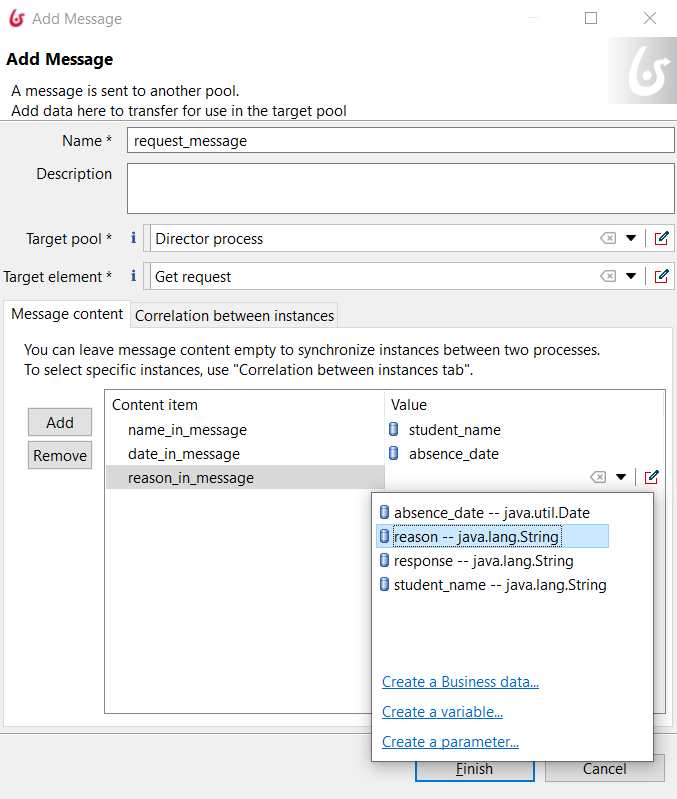
- Click Finish. a flow from Send request to Get request appears in your process.
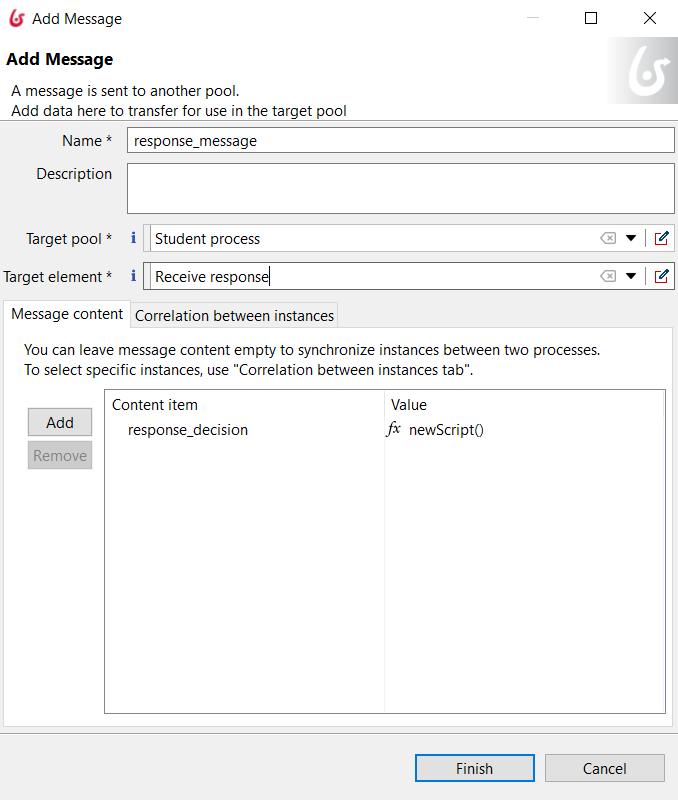
- Click on Reply student message. Then General → Messages → Add.
- Name the message as response_message.
- Select Target Pool Student process and target task Receive response.
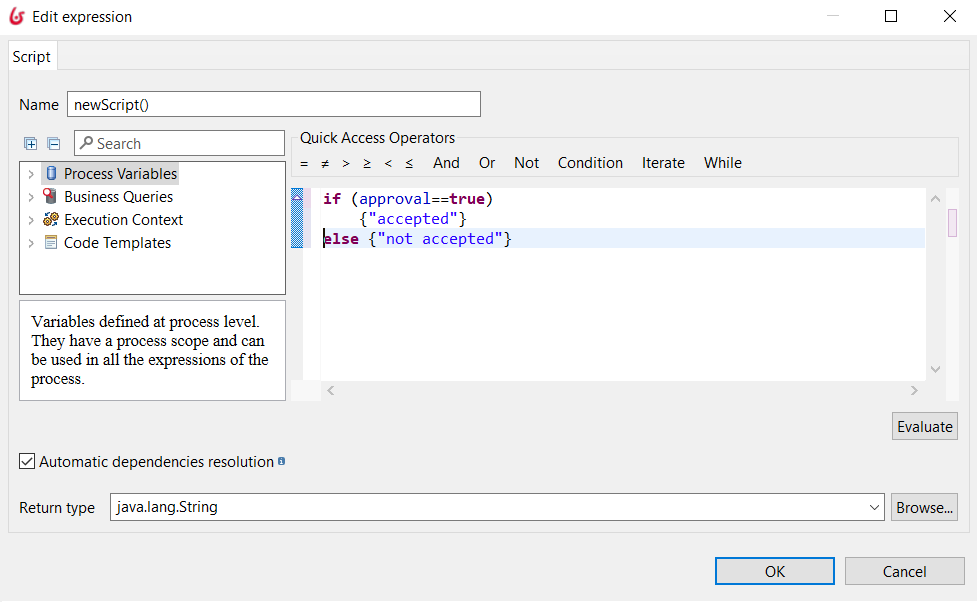
- In Message content, add a variable named response_decision. In Value Name, click on Edit. Change the script name newScript() to request_script (without parentheses). Delete '' from the text area, paste the following code and click Ok.
if (approval==true) {"accepted"} else {"not accepted"}
- This is the image of this step.
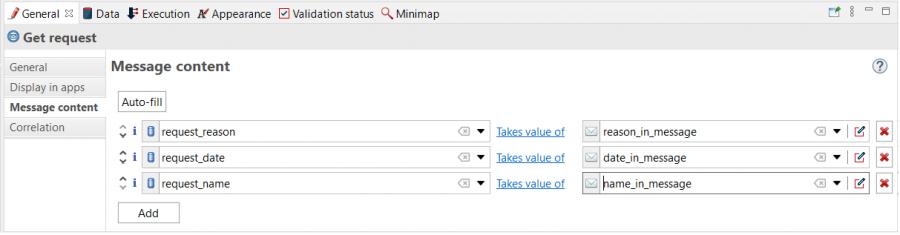
- Click on the Get request message. Select General → Message content → Add. Select request_reason from the first list which takes value in reason_in_message from the second list. Add two others variables as in the figure.
- Same way, click on Receive response message. Then, General → Message content → Add. Select response from the first list which takes value in response_decision from the second list.
- Insert another task between Receive response and End 1 to see the result of the received message. Name it See result and set actors student.
- Finish design. Make sure that you do not have any error.
- Save the process.
- Before running the process, map the actors to your organization group and roles.
- Click on the Student process, then Configure tab. Map the student to Staff group and Student role.
- By the same way, click on the Director process and map the director actor to staff group and Director role.
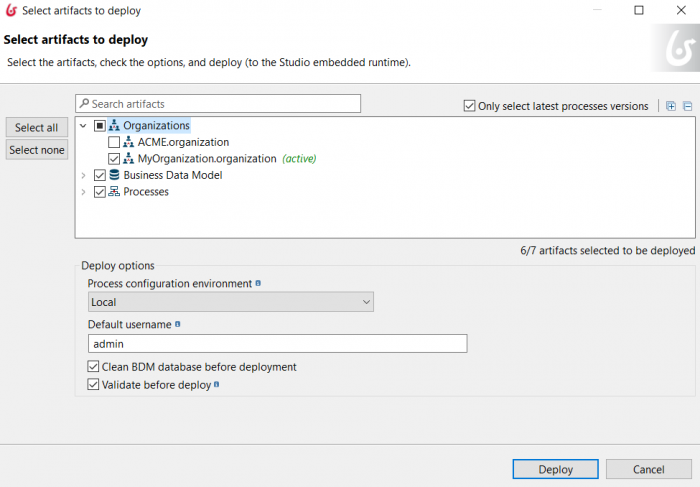
- Click on the Deploy menu to deploy your organization, process and model.
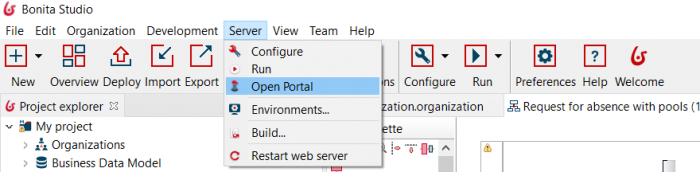
- Click on Server→Open Portal.
- In Bonita Portal, Sign out from the admin account and Sign in as olivier (Remember that olivier is a student in your organization).
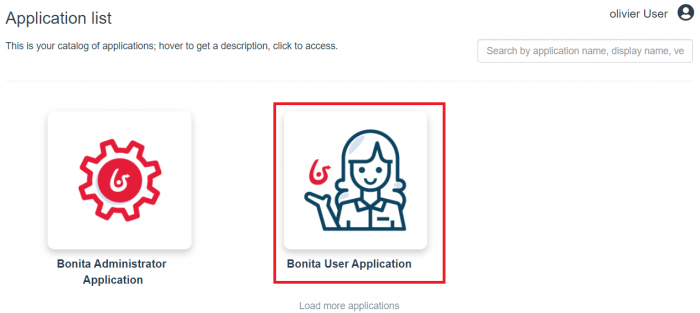
- Select Bonita User Application.
- Click on the Processes tag and launch the Student Process.
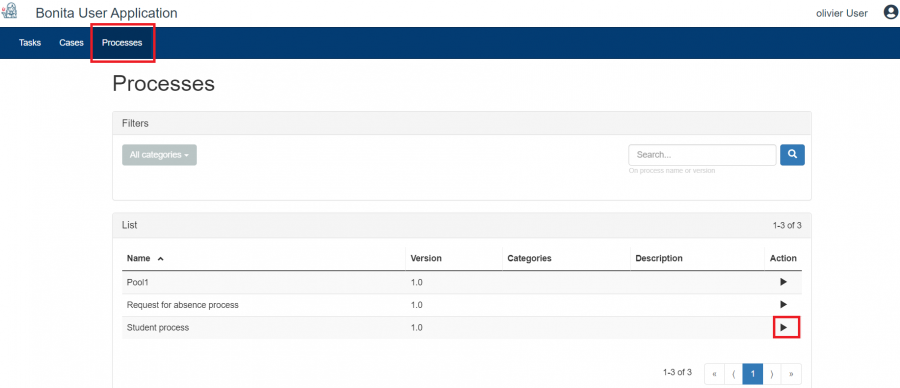
- Click on the Start button.
- Click on Tasks tag.
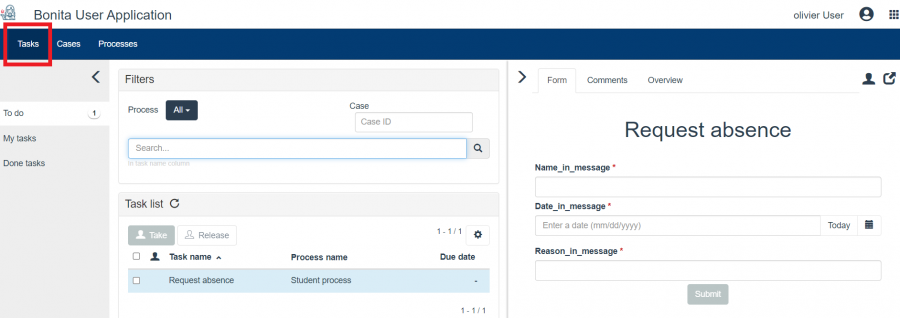
- Take the Request Absence task.
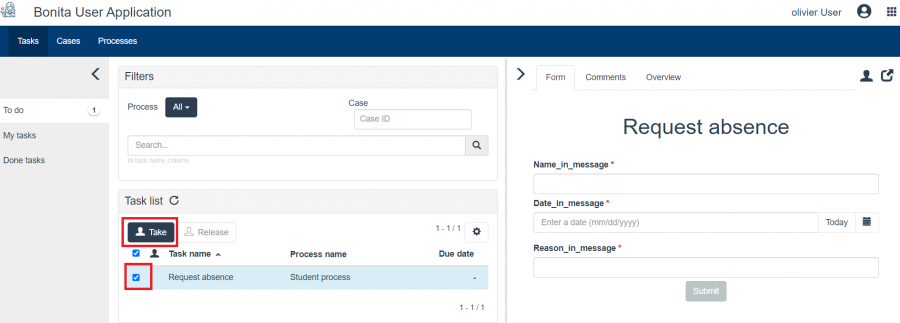
- A notification comes in My Tasks.
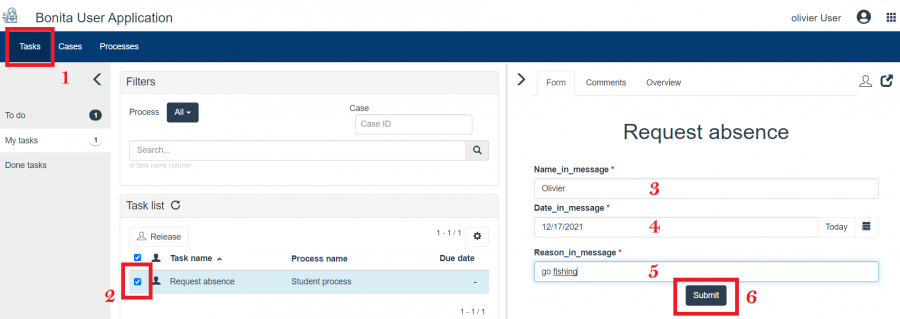
- Click on My tasks. Select Request Absence, fill in the informations then Submit.
- Fill in date, reason and student name and click submit.
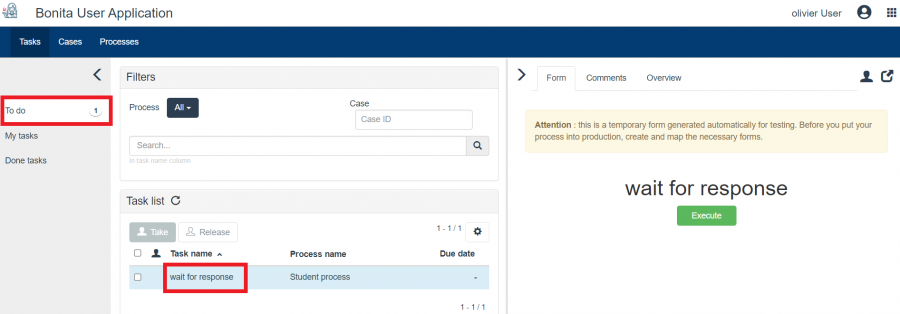
- Refresh Task List.
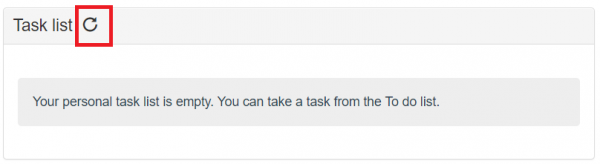
- Click on To do tag. As you can see, the student pass to the Wait for response step. He waits now for a response from the director.
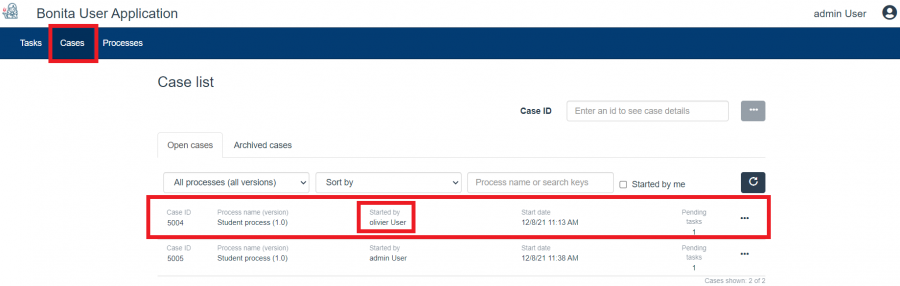
- Sign out then Sign in as admin (who is a director). Click on Cases menu in the page. At the top of cases list, you find the action that was started by Olivier.