Table of Contents
GitHub Tutorial for a remote project
In this tutorial, you will learn how to use GitHub and work with others.
Gravatar Signup
I would recommend you to signup for Gravatar first, so that you have a globally recognizable avatar that will be used to identify your Git commits. Navigate to https://en.gravatar.com/ for signup, use the same email as you configured in your local Git and upload your favorite photo as your avatar.
Github Signup
Github is now the world’s largest and most dynamic repository of open-source code. Let’s get started by navigating to http://www.github.com then signup for an account which you will use for hosting your source code for this tutorial and likely for future projects. And again, please use the same email address.
Generating SSH keys
Before getting started, we need to generate some ssh keys so that GitHub knows that we have access rights as documented here.
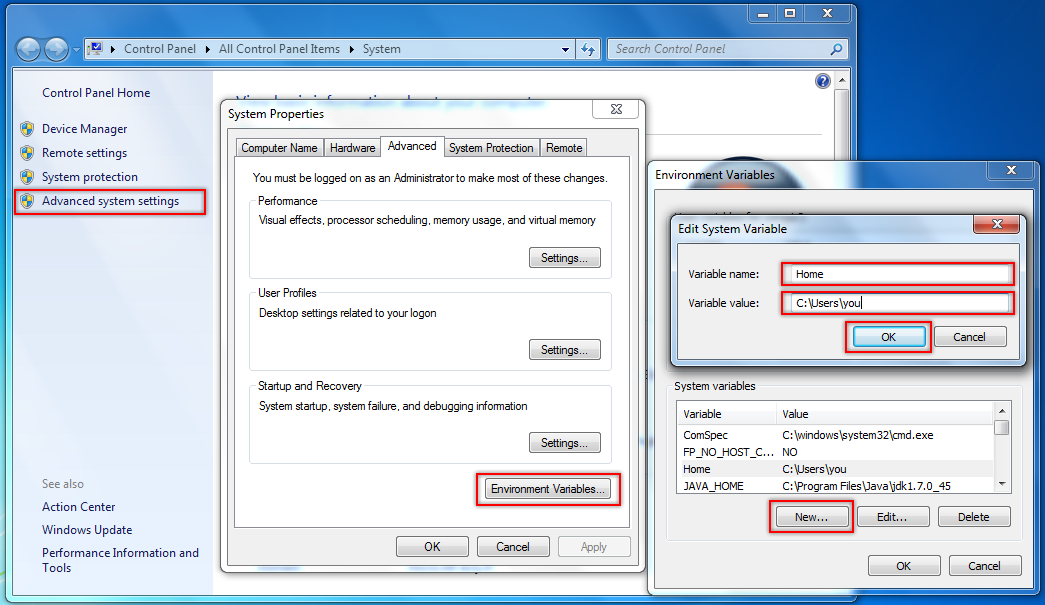
- Firstly, only for Windows users, the system variable of home directory need to be added:
- Then, run the ssh-keygen command:
$ ssh-keygen -t rsa -C "you@example.com"
Generating public/private rsa key pair.
Enter file in which to save the key (/c/Users/you/.ssh/id_rsa): .ssh/id_rsa #Enter .ssh/id_rsa here
Enter passphrase (empty for no passphrase): #Hit enter
Enter same passphrase again: #Hit enter
Your identification has been saved in .ssh/id_rsa.
Your public key has been saved in .ssh/id_rsa.pub.
The key fingerprint is:
**:**:**:**:**:**:**:**:**:**:**:**:**:**:**:** you@example.com
The key's randomart image is:
+--[ RSA 2048]----+
|                 |
|                 |
|                 |
|     ** **       |
|    * * *        |
|   * * **        |
|  * * ****       |
| ****  **        |
|  ********       |
+-----------------+
- Next, go to your home directory:
- for Windows:
$ cd %HOME%
- for UNIX-based OS:
$ cd ~
- Then use cat and copy the key to your clipboard as shown (starting from “ssh-rsa” to “you@example.com”):
$ cat .ssh/id_rsa.pub
ssh-rsa AAA*********************************************************************
********************************************************************************
********************************************************************************
*********************************************************End you@example.com
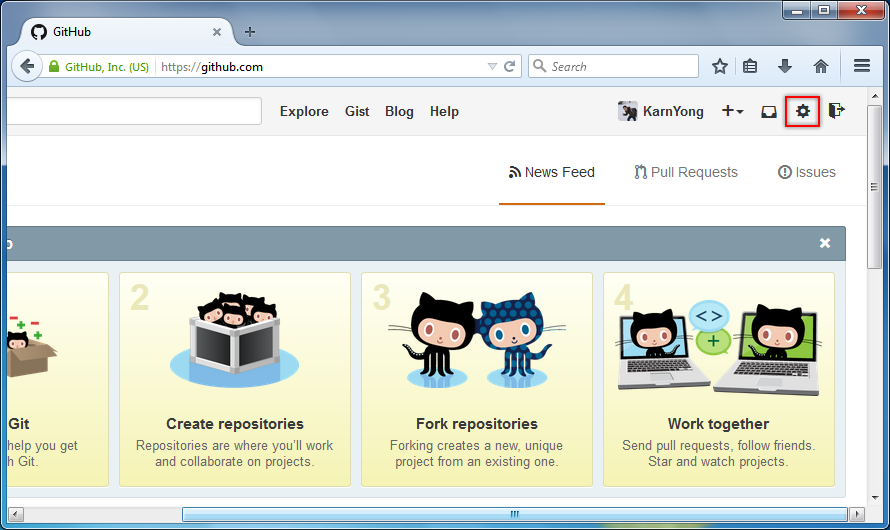
- Navigating to http://www.github.com. Make sure to login, then click ⚙ in the top right corner of the page:
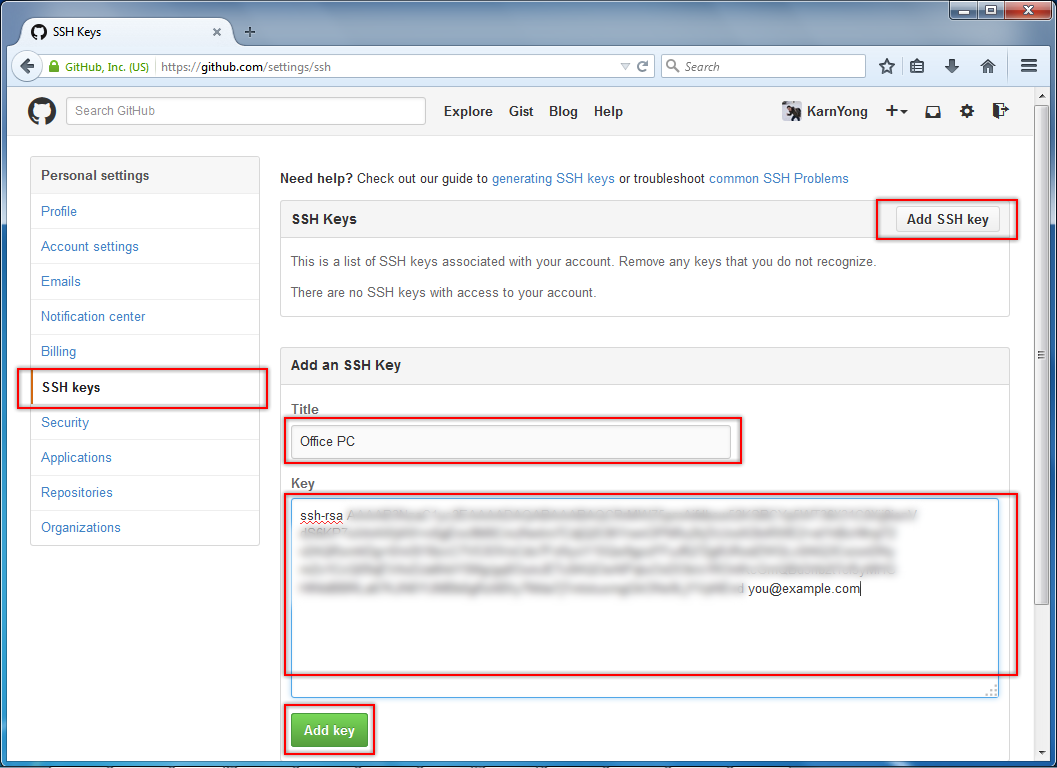
- In the user settings sidebar, select SSH keys. Click Add SSH Key in the top right, enter a Title and then paste the key into the Key field. Hit Add Key to finish.
- Now come back to the command line. You can try SSHing to GitHub by typing in:
$ ssh -T git@github.com
You should see this if you have added the SSH key successfully:
Hi You! You've successfully authenticated, but GitHub does not provide shell access.
Congratulation, now you are ready to use GitHub!


Using Git for a remote project
If you haven’t create your project as a local Git repository, please follow the previous tutorial before starting this tutorial.
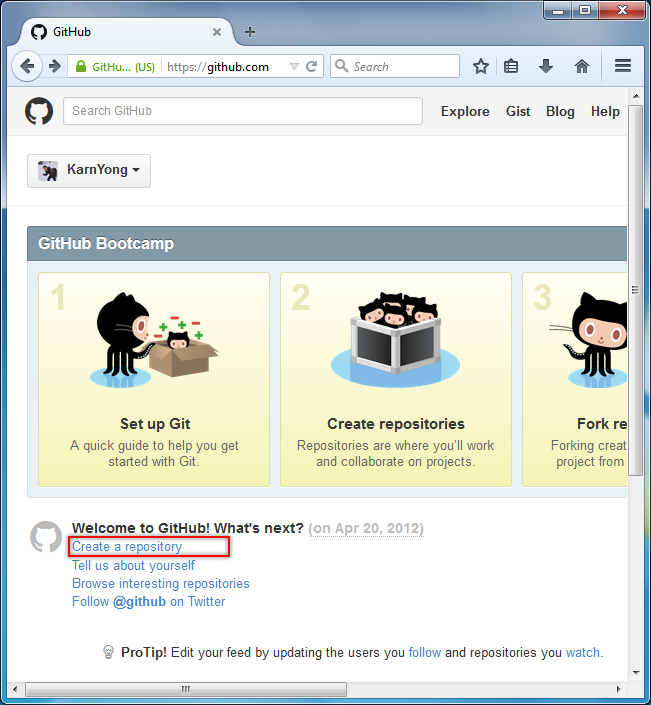
- Let’s start by pushing your project to GitHub. Navigating to http://www.github.com. Make sure to login, then click Create a repository.
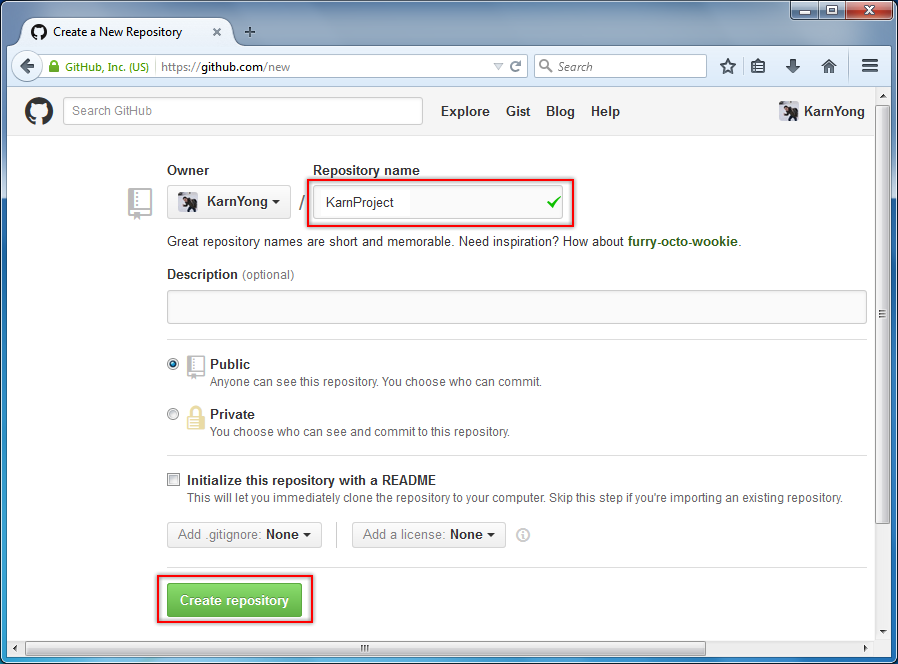
- Enter your repository name in a Repository name field then hit Create repository:
Note that public repositories are free, but private costs money. However, if someone copies your code without attribution it will be obvious by the timestamps. - After a new repository is created, copy the first line in the highlighted box:
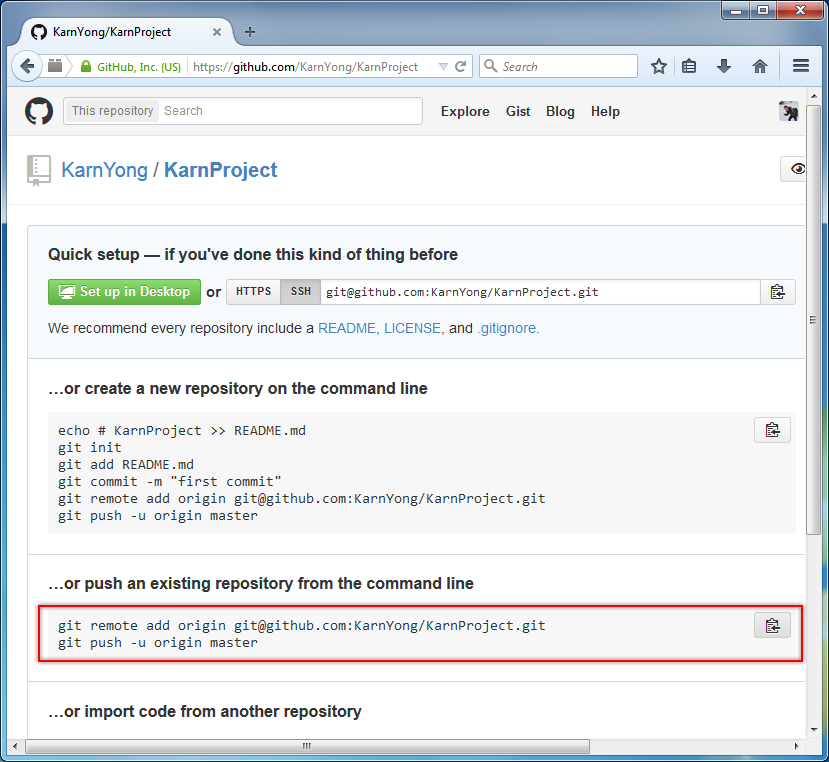
- Now come back to the command line, enter the following commands to push to GitHub:
$ git remote add origin git@github.com:YOUR_USERNAME/YOUR_PROJECT.git

$ git push -u origin master
Counting objects: 9, done.
Delta compression using up to 4 threads.
Compressing objects: 100% (3/3), done.
Writing objects: 100% (9/9), 697 bytes | 0 bytes/s, done.
Total 9 (delta 0), reused 0 (delta 0)
To git@github.com:you/YOUR_PROJECT.git
 * [new branch]      master -> master
Branch master set up to track remote branch master from origin.
- Navigate to the URL you just set up, at https://github.com/YOUR_USERNAME/YOUR_REPOSITORY, you will see a git repository:
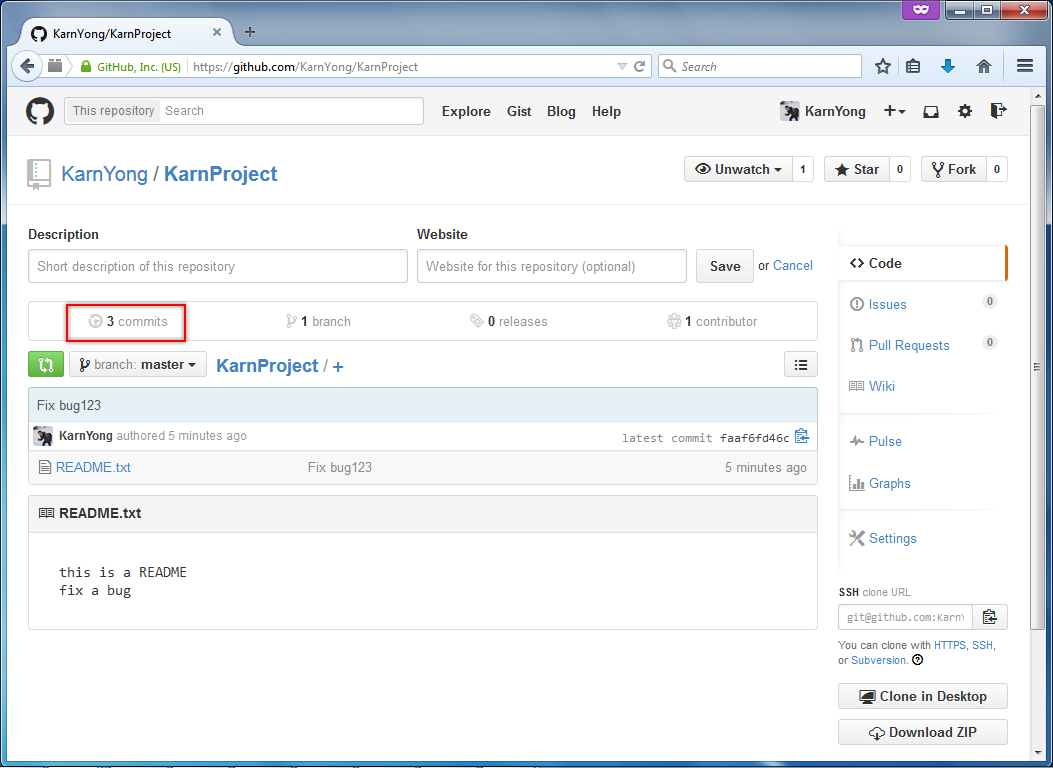
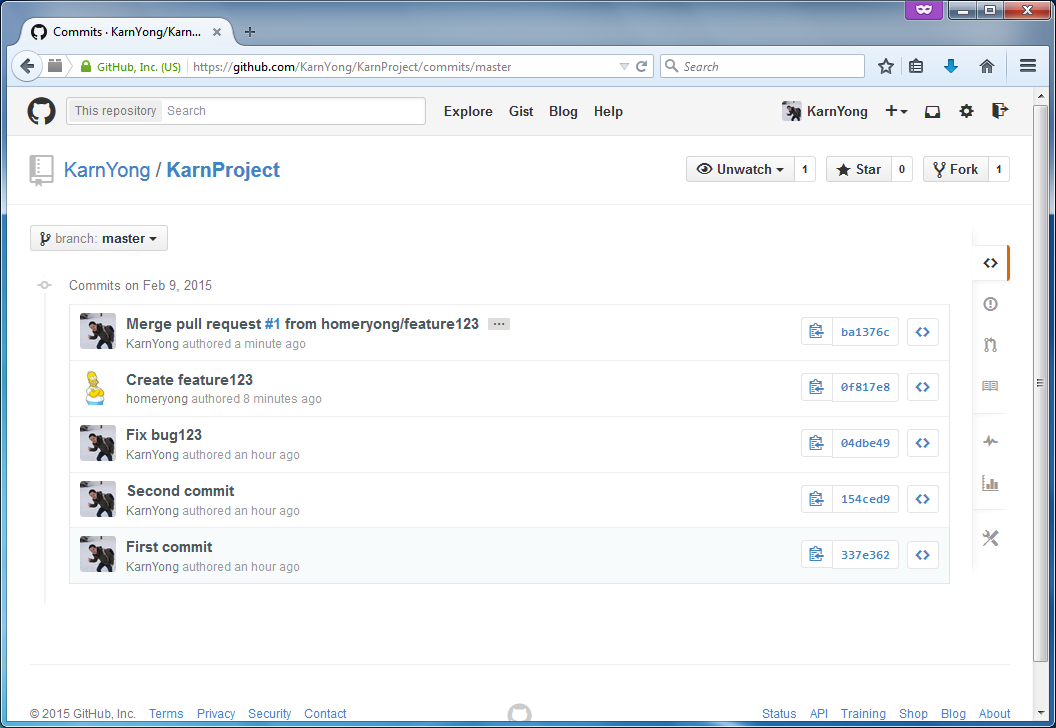
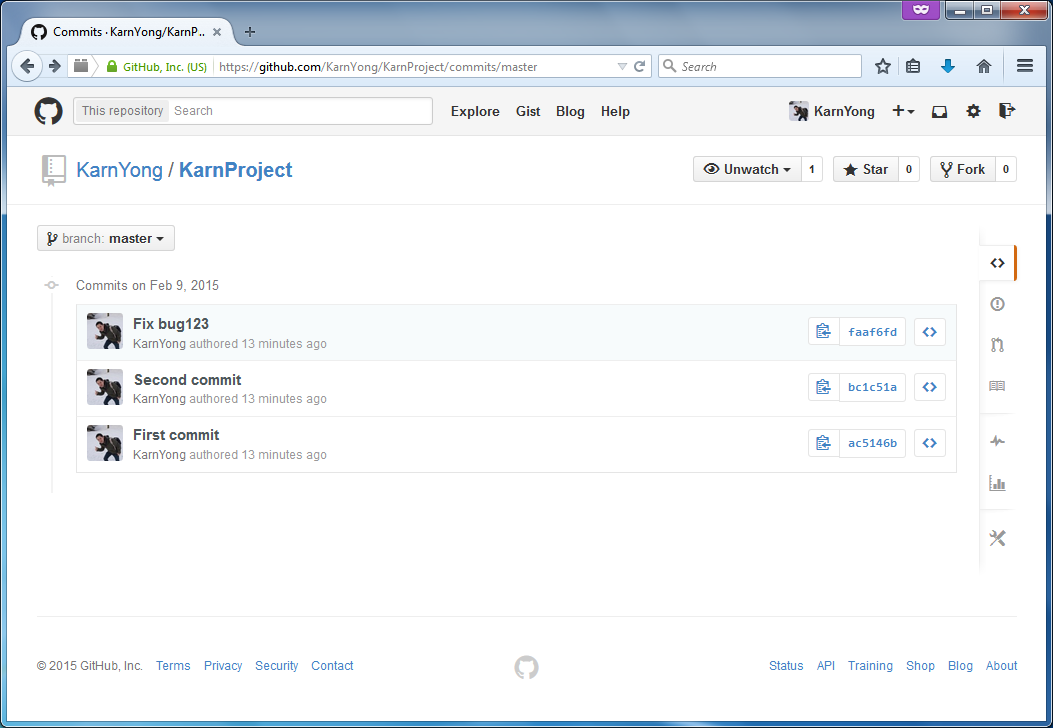
- Navigate to https://github.com/YOUR_USERNAME/YOUR_REPOSITORY/commits/master, you will see your command line commits on the web:
For GitHub, A fork is a copy of a repository. Forking a repository allows you to freely experiment with changes without affecting the original project. Next, you will fork your buddy project, make some changes locally, then submit changes (pull request) to the project owner. - At this point, you will need a buddy to follow the tutorial. Hopefully, you can find one, otherwise you will need operate two users on two different machines to do next steps.
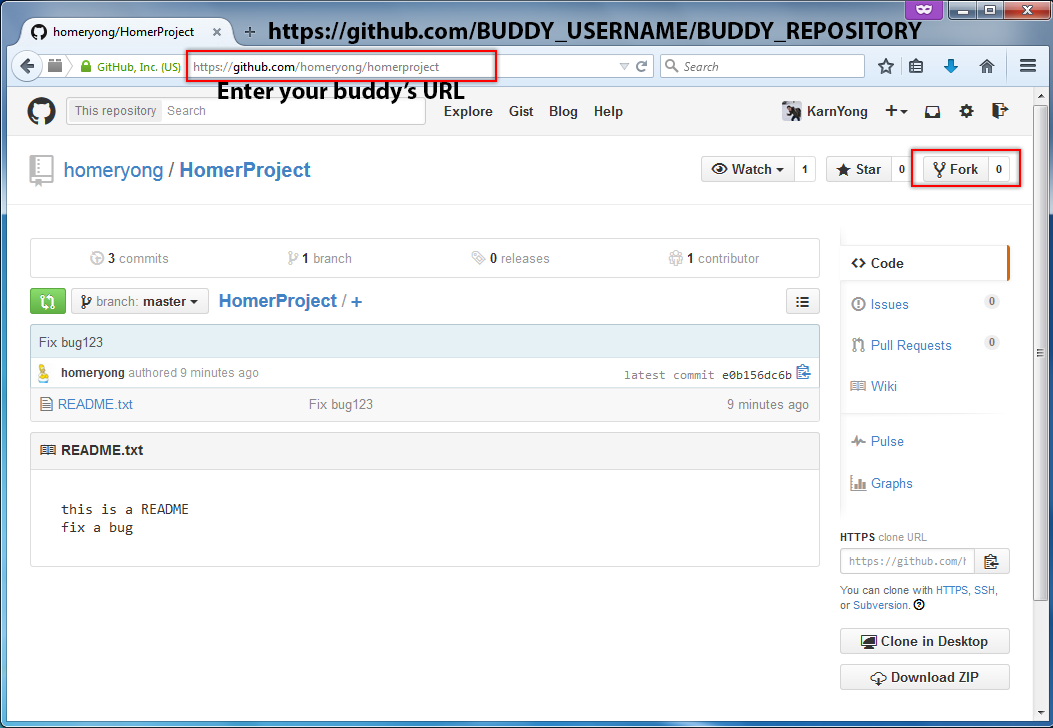
- Fork buddy’s repository, by navigating to your buddy’s repository by the URL (http://github.com/BUDDY_USERNAME/BUDDY_REPOSITORY), then click on Fork.
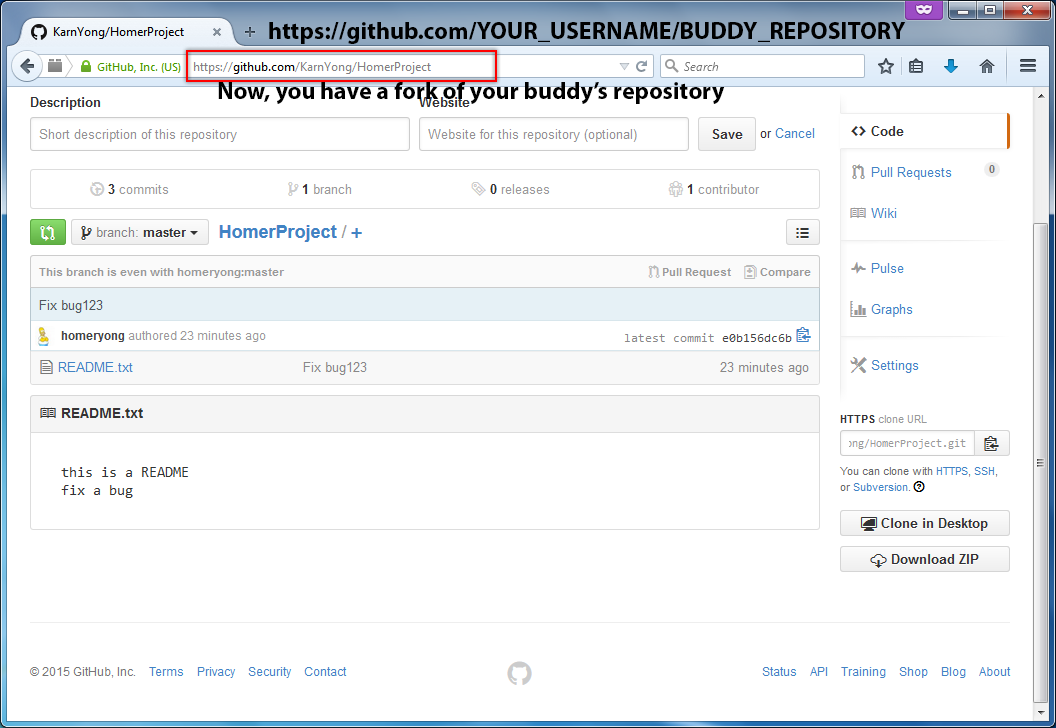
- After that, you will have a copy of the repository (fork) at URL: https://github.com/YOUR_USERNAME/BUDDY_REPOSITORY:
- Clone the fork by command:
$ git clone https://github.com/YOUR_USERNAME/BUDDY_REPOSITORY.git
- Enter into the fork and see the configured remote repository by:
$ cd BUDDY_REPOSITORY
$ git remote -v
origin  https://github.com/YOUR_USERNAME/BUDDY_REPOSITORY.git (fetch)
origin  https://github.com/YOUR_USERNAME/BUDDY_REPOSITORY.git (push)
- Create and checkout to a new branch, make some changes and then commit.
$ git checkout -b feature123
$ echo "new feature" > feature123.txt
$ git add feature123.txt
$ git commit -m "Create feature123"
[feature123 d0877fc] Create feature123
 1 file changed, 1 insertion(+)
 create mode 100644 feature123.txt
- Push your new branch to your remote repository:
$ git push origin feature123
Username for 'https://github.com': YOUR_USERNAME
Password for 'https://YOUR_USERNAME@github.com':
Counting objects: 4, done.
Delta compression using up to 4 threads.
Compressing objects: 100% (2/2), done.
Writing objects: 100% (3/3), 305 bytes | 0 bytes/s, done.
Total 3 (delta 0), reused 0 (delta 0)
To https://github.com/YOUR_USERNAME/BUDDY_REPOSITORY.git
 * [new branch]      feature123 -> feature123
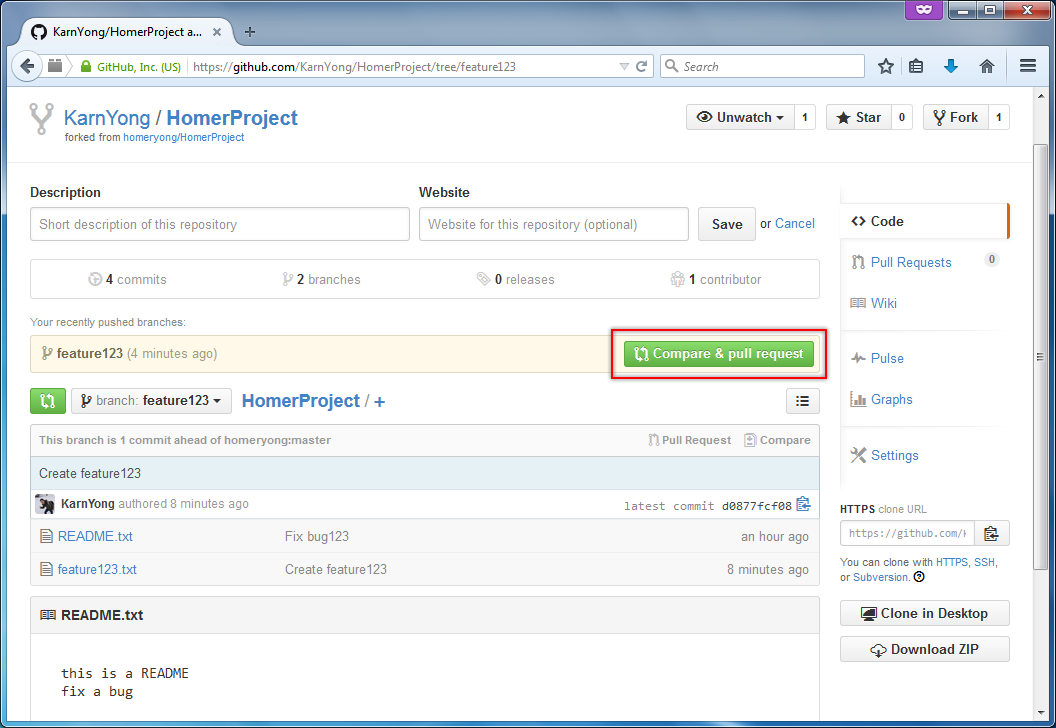
- Navigate to your fork by URL: https://github.com/YOUR_USERNAME/BUDDY_REPOSITORY. You will notice that a new branch is created in your remote repository. You can submit the changes of this branch to the original owner of the project by pressing Compare & pull request.
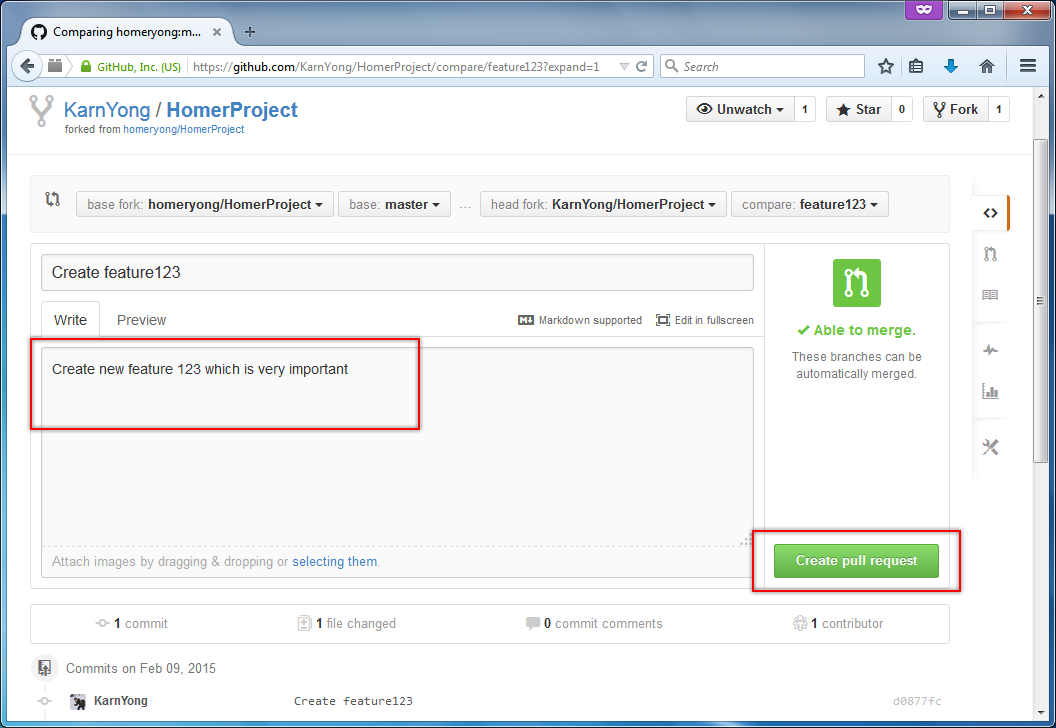
- Enter pull request description in the Write field and hit Create pull request:
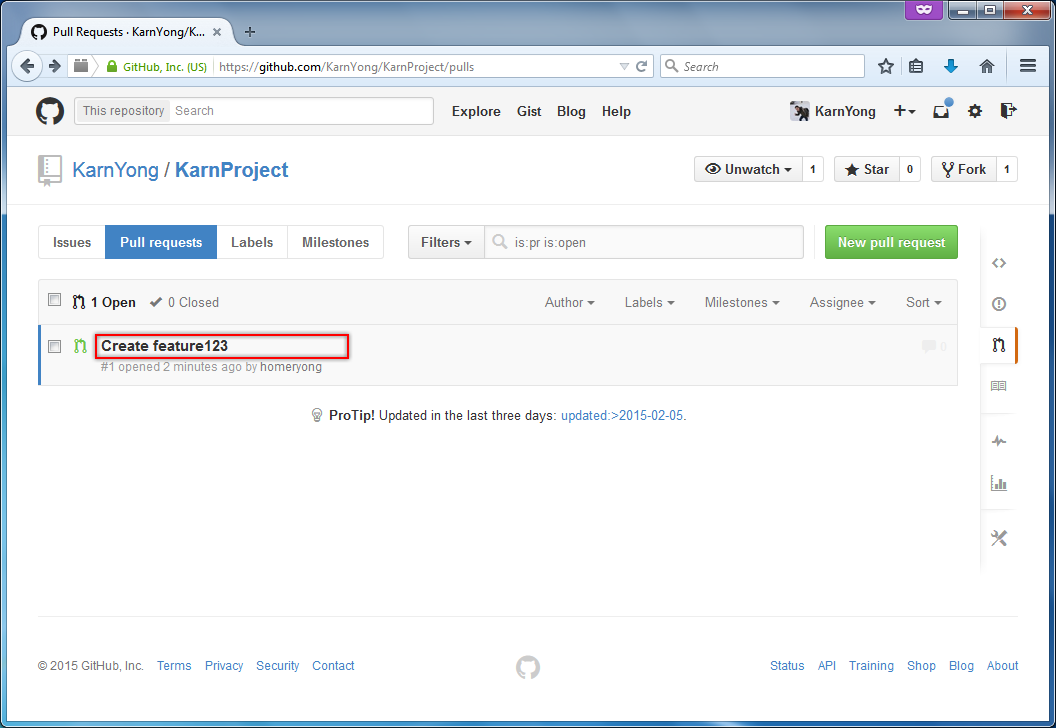
- Hopefully, you buddy has requested the pull request to you as well. You will see the notification on the right menu. To merge this pull request, click on Pull Requests:

- Select the pull request by its name:
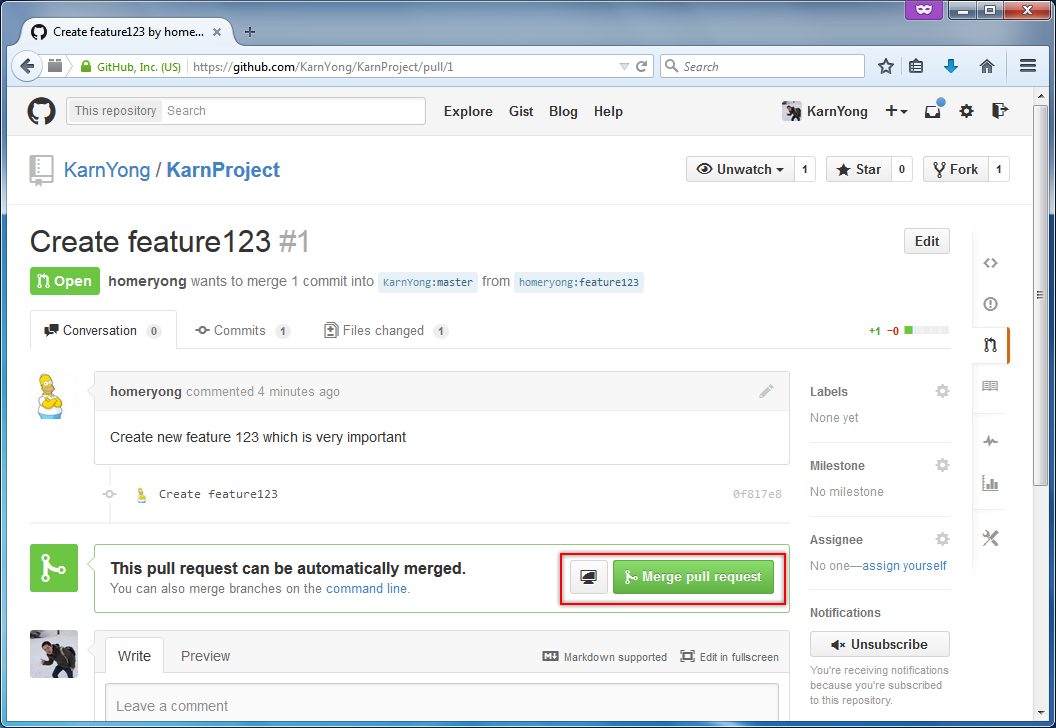
- You can review the changes here, then hit on Merge pull request:
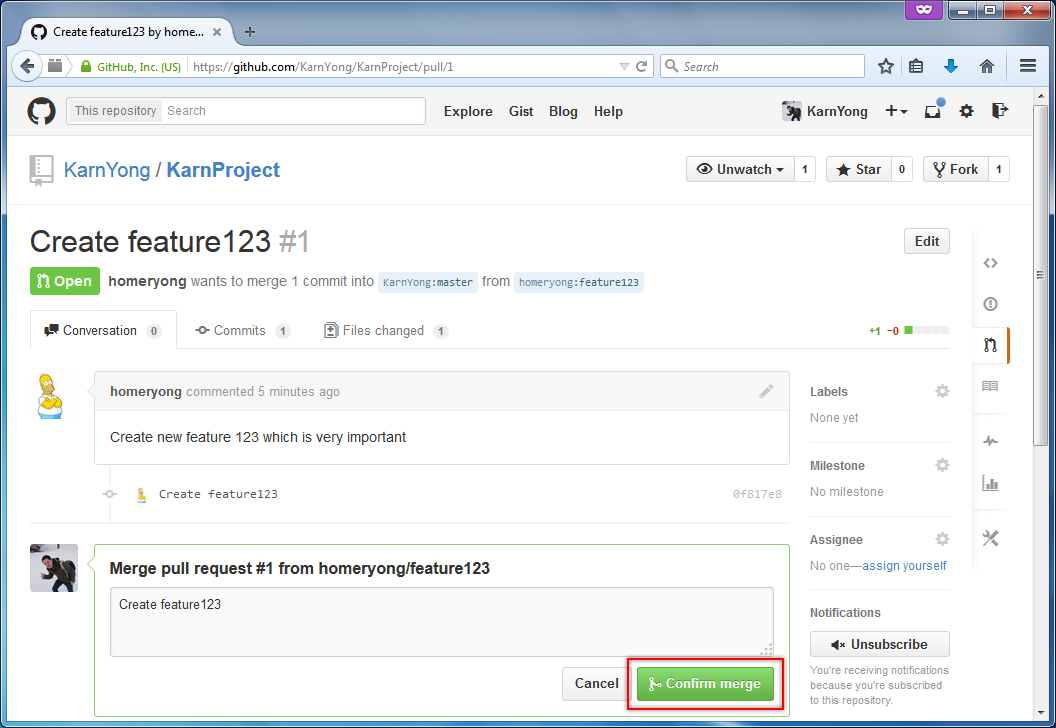
- Click on confirm merge:
- Now the pull request has been merged into your repository.:
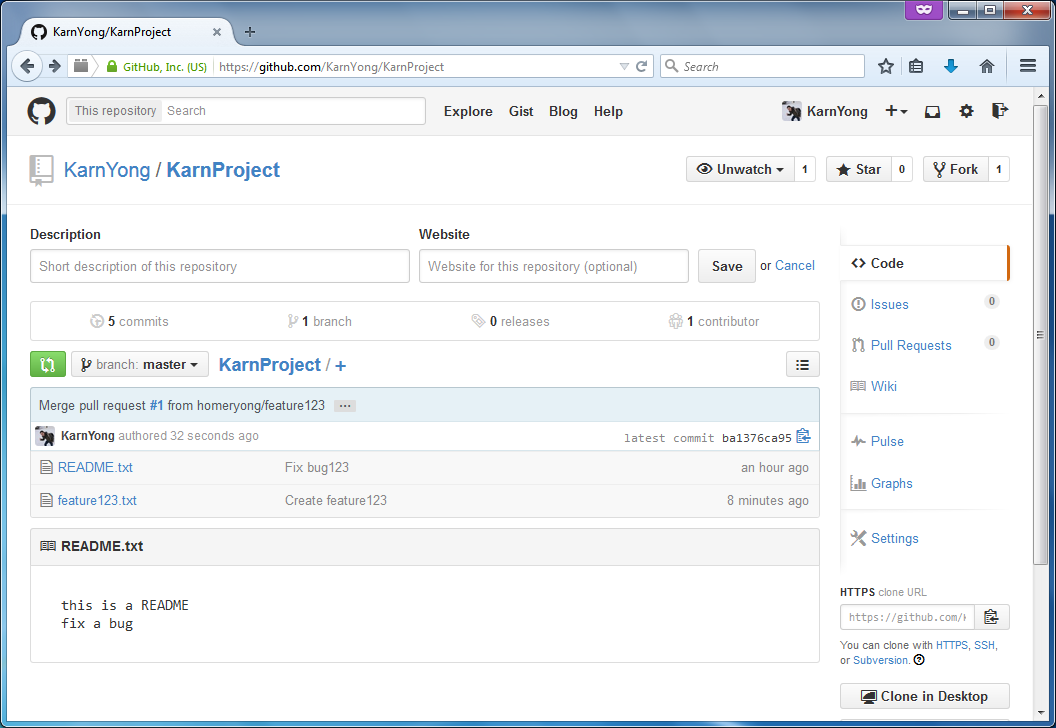
- Finally, you can view commit logs: