Table of Contents
WS deployment with Eclipse photon (4.8.0) and Tomcat v9 (requires java 1.8)
This tutorial shows how to create a web service using Eclipse for Java EE and deploy it on the Tomcat server. All needed tools are provided in [https://www-inf.telecom-sudparis.eu/~gaaloulw/Downloads/|https://www-inf.telecom-sudparis.eu/~gaaloulw/Downloads/]].
Download Eclipse IDE for Java EE Developers
Setting up Tomcat on Eclipse
- Download and extract Tomcat (suppose version 9.0.52) on your machine.
- Open the server view on Eclipse by the menu Windows→Show View→Other→Servers.
- Right click on the Server view select New→Server. Let the Server's host name is localhost, select the Server type is Apache→Tomcat v9.0 Server. Click Next.

- Specify the installation directory, such as C:\Program Files\Apache Software Foundation\Tomcat 9.0. Click Finish.

- You can test the server by clicking on the Start and Stop button at the Server view. You can also reconfigure the server by selecting Windows→Preferences→Server→Runtime Environments.

Setting up Axis2 on Eclipse
- Apache Axis2 is Web services/SOAP/WSDL engine and is the successor of Apache Axis. It supports both SOAP 1.1 and 1.2.
- Download and extract Axis2 1.6.2 binary distribution and extract it on your machine.
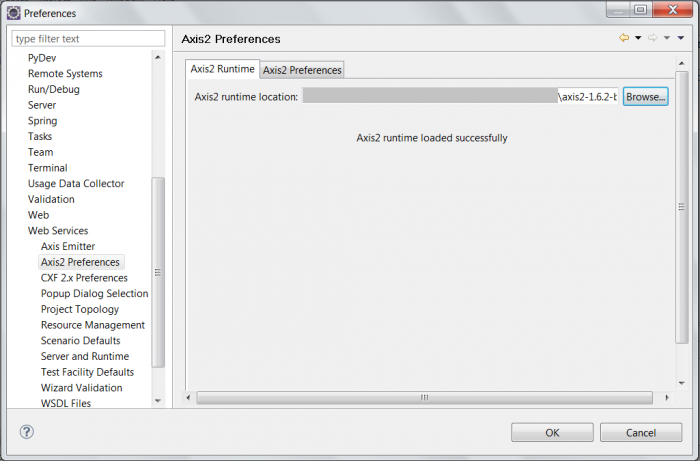
- Select Window→Preferences on eclipse. Go to Web services→Axis2 Preferences. In Axis2 runtime location browse to your axis2 home folder, for example ~/axis2-1.6.2-bin/axis2-1.6.2. Click Ok.
HelloWorld service deployment
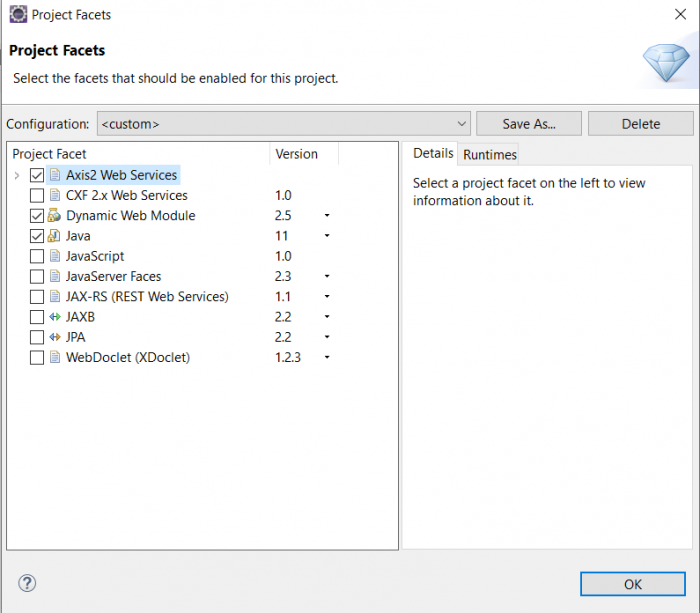
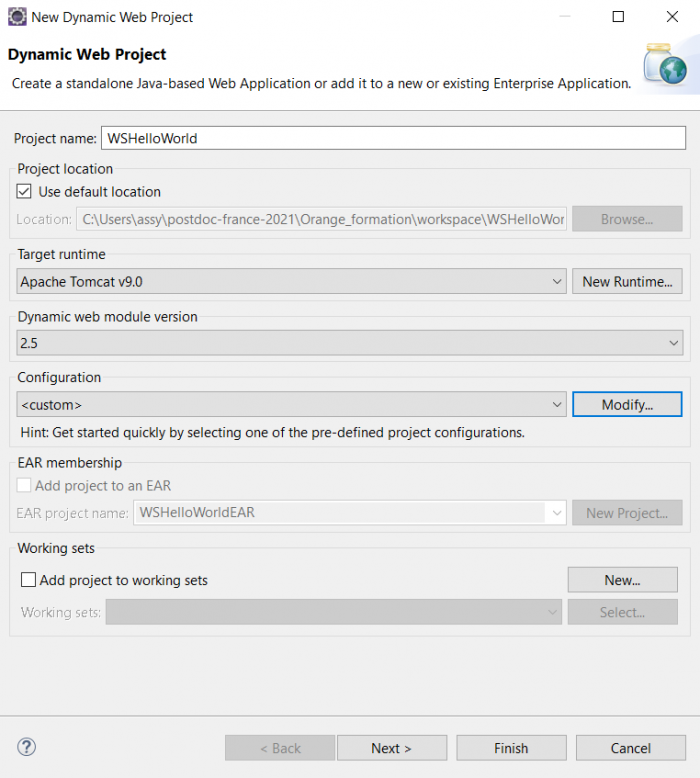
- Create a Dynamic Web project named WS_HelloWorld by selecting File→New→Dynamic Web Project. Keep the Target Runtime as Apache Tomcat v9.0. Select the Dynamic web module version as 2.5. In the Configuration part, click on modify and check Axis2 Web Services then click Ok. Click Finish.
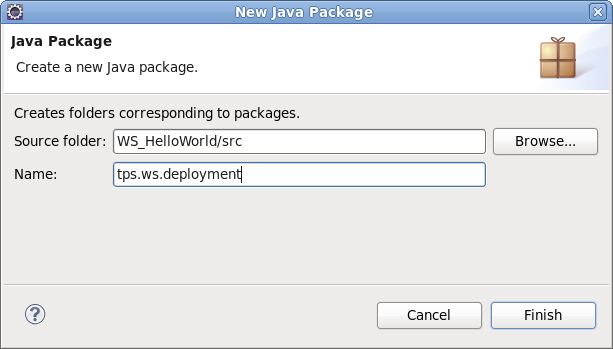
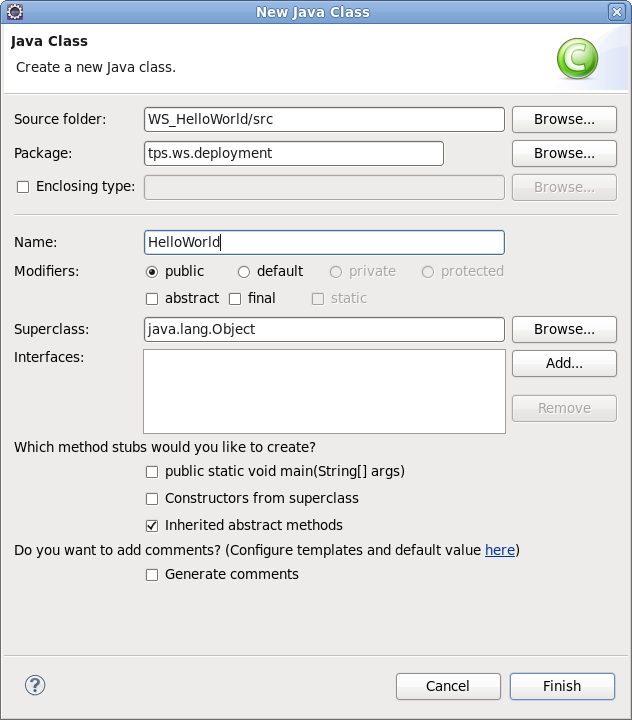
- Open the WS_HelloWorld project, right click on the Java Resources directory, select New→Package. Name it as tps.ws.deployment. Click Finish.
- Create a Java class under the package tps.ws.deployment named HelloWorld.
- if you are using another Java version change “Hello ”+input; by “Hello”.cancat(input); or change Project facets to 1.8 in Eclipse
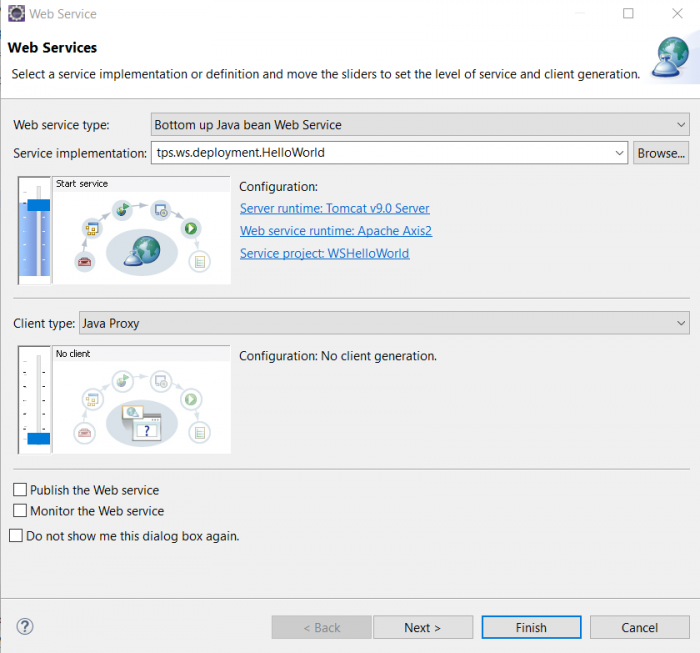
- Right click on the HelloWorld class, select Web Sevices→Create Web service.
- In the Configuration part, select Web service runtime: Apache Axis and select Apache Axis2 in the Web service runtime tab, then click Ok. Click Finish.
- The WS skeleton is automatically generated, the service is automatically published on the Eclipse's Tomcat server, and the Tomcat server automatically run.

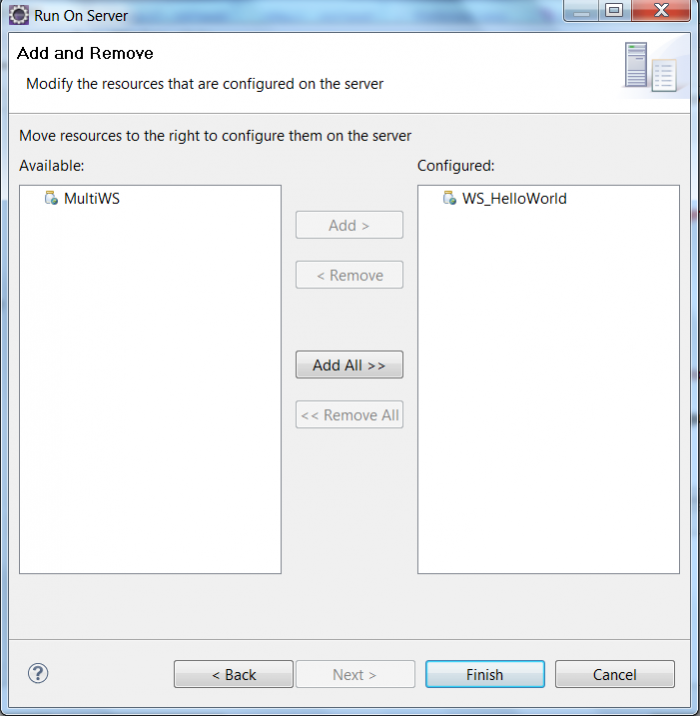
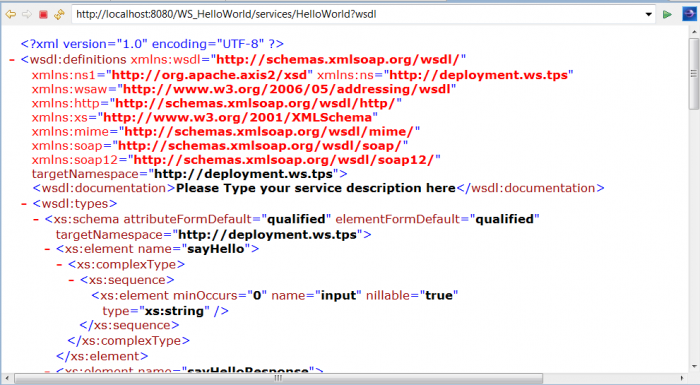
- The WSDL file in axis2 is dynamically generated on service deplyment. To access it from eclipse Web service explorer, right click on WS_HelloWorld project, then Run as→Run on a server. Choose Tomcat v9.0. Click Next.
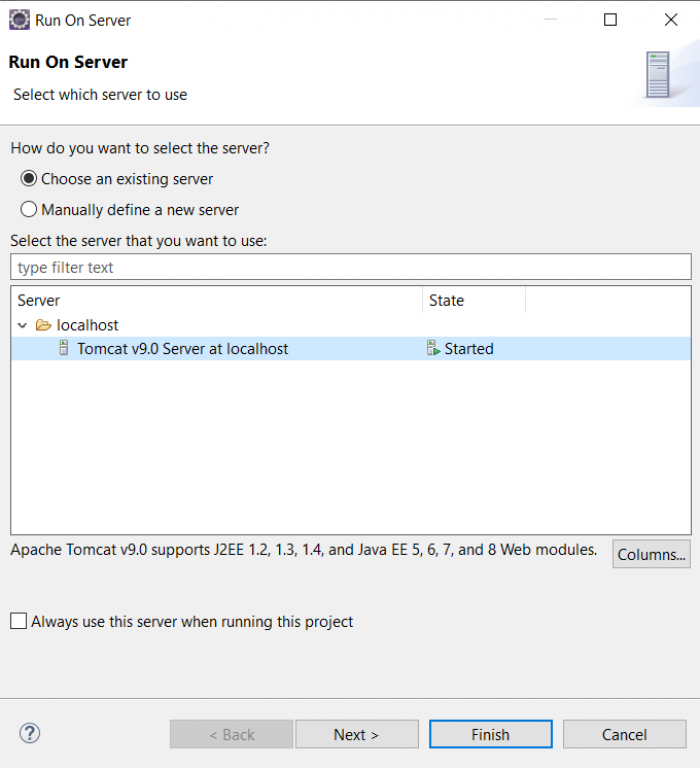
- Make sure that WS_HelloWorld project is in the Configured list. If not add it from Available list to Configured list. Click Finish.
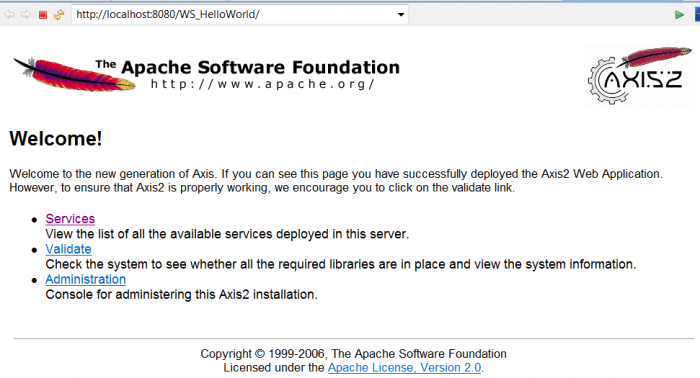
- A Welcome page appears.
- Select services. A list of available services is presented. Click on HelloWorld service to see the corresponding WSDL file.
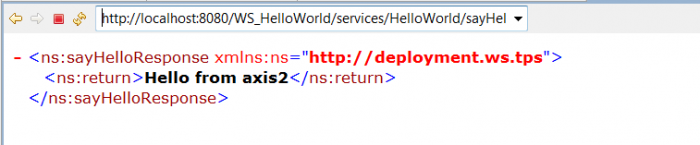
- To invoke the sayHello operation with the input String from axis2, enter the following url in eclipse web service explorer http://localhost:8080/WS_HelloWorld/services/HelloWorld/sayHello?input=from axis2. If it doesn't work, replace from axis with from%20axis. You will get the response Hello from axis2.
- To access your service from your browser, right click on WS_HelloWorld, then select Export→war file. Browse to your tomcat Webapps folder and click Finish.
- Start your server from your tomcat bin folder. If it doesn't start, follow the steps below to run the server from the command line.
- open the command line and navigate to the tomcat bin folder: cd [path to your tomcat]/bin
- Setup JAVA_HOME and PATH variables in the current shell (make sure that you use the same java version used by eclipse). Suppose your java was installed at “/usr/lib/jvm/java-11.0.12”:
$ export JAVA_HOME=/usr/lib/jvm/java-11.0.12 $ export PATH=$JAVA_HOME/bin:$PATH- On Windows:
    >set JAVA_HOME=C:\[java home]\jdk11.0.12
    >set PATH=%JAVA_HOME%\bin;%PATH%
- start the server by running startup.sh on linux, or startup on windows.
- Then enter the following url http://localhost:8080/WS_HelloWorld/services/HelloWorld?wsdl to access to the wsdl file.
Exercises
- Modify the server port number in [your tomcat home folder]/conf/server.xml to 8081.
 <Connector port="8081" protocol="HTTP/1.1"
               connectionTimeout="20000"
               redirectPort="8443" />
- Restart your tomcat server. Can you access the service HelloWorld?
- Create a simple calculator service with 4 operators: addition, subtraction, multiplication and division.
- Create a WS which receives an integer and returns an array of prime numbers less than this integer.
- Create a sorting service which sorts an inputed arrays of integers or doubles.
- Suppose that your database stores information about persons. Create a service which receives a person ID and returns the name and age of that person.
- Create a sorting service which can sorts an input array of person (in the exercise 4) by name or by ID.
