Table of Contents
BPEL HelloWorld process with Eclipse BPEL designer and Apache ODE
Objective: deploying a BPEL process which receives an input string from a client and responses it exactly that input.
Tools: Eclipse 3.6, BPEL Designer 0.5.0 Plugin, Tomcat 7.0.53, ODE 1.3.5
Deploying a the HelloWorld BPEL process
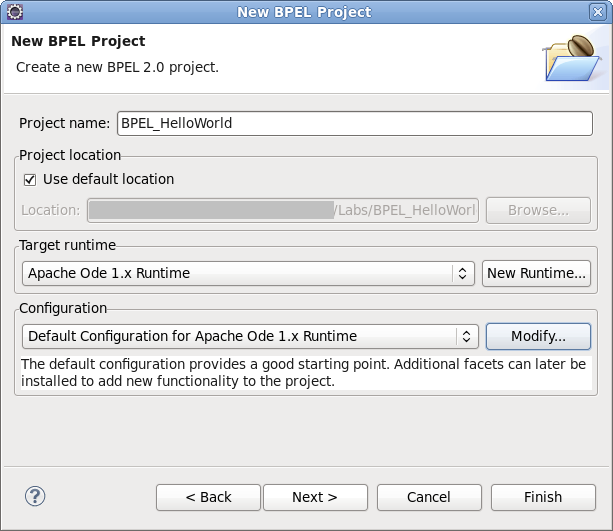
- Create new BPEL project: File→New→Others→BPEL 2.0→BPEL Project.
- Name it BPEL_HelloWorld. Select the Target Runtime as Apache ODE 1.x Runtime and Configuration as Defaut Configuration for Apache ODE 1.x Runtime. Click Finish.
- In the folder BPEL_HelloWorld\bpelContent, File → New → Other → BPEL 2.0 → New BPEL process file.
- Name it HelloWorld, Namespace http://helloworld.localhost. Click Next.
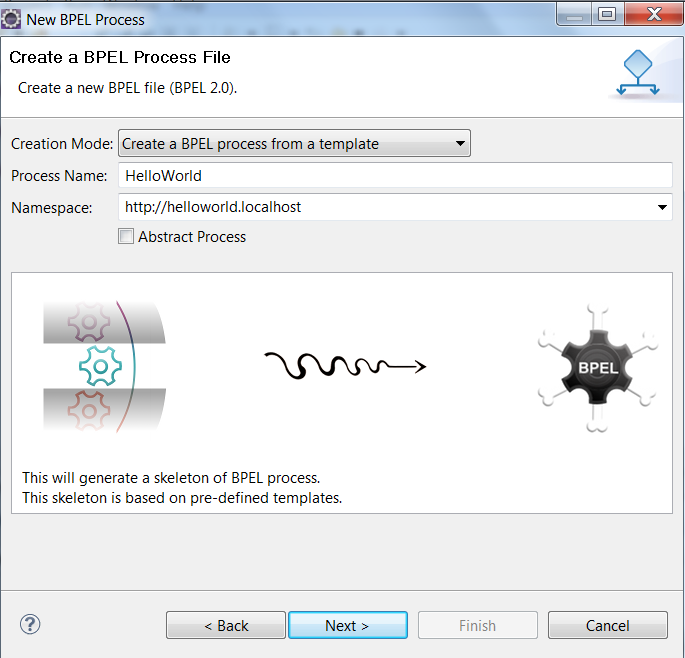
- Select Template Synchronous BPEL Process and edit the Service Address to : http://localhost:8080/ode/processes/HelloWorld (suppose that your Tomcat environment runs at port 8080) and keep other default declarations. Click Finish.

- Three files are created in the folder bpelContent and the HelloWorld.bpel is opened for editing the BPEL process.
- Click to open the Palette panel on the right of the canvas. (or right click on the canvas, select Show Pallette on Palette View)
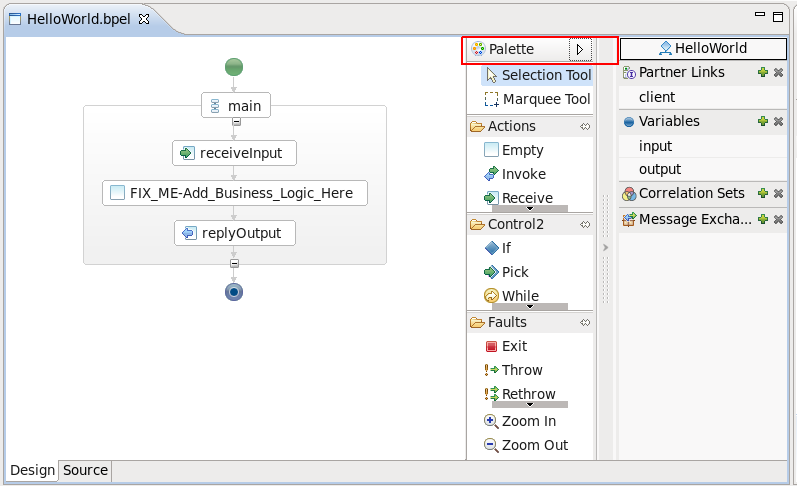
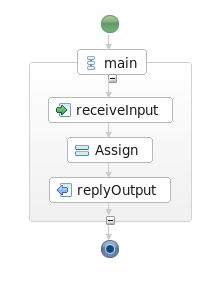
- Drag the Assign action next to the receiveInput action and delete the FIX_ME-Add_Business_Logic_Here.
- Right click on the Assign activity. Select Show in properties.
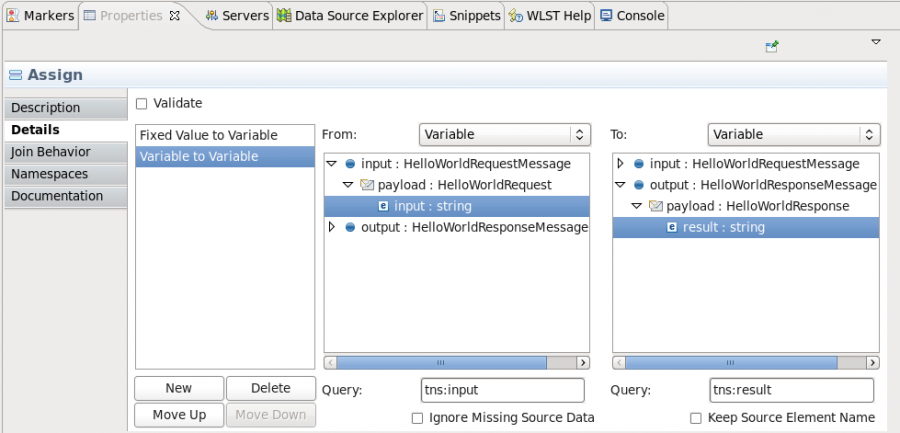
- In the Properties tab, select Details. Click on the New button to define an assign operator.
- Assign from input→payload→input to output→payload→result. An Initializer popup dialog appear. Click Yes to initialize the output variable and save the process.
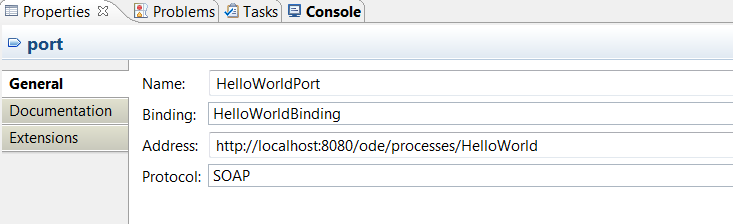
- Open the WSDL file HelloWorldArtifacts.wsdl. Right click on HelloWorldPort, choose show properties and make sure that the port address is http://localhost:8080/ode/processes/HelloWorld.
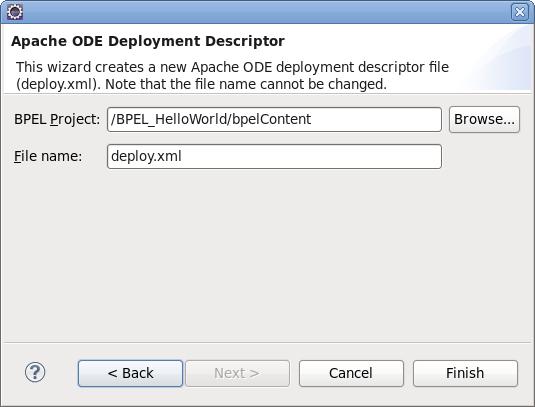
- It's time now to deploy the BPEL project. Click on the folder bpelContent, select File→New→Others→BPEL 2.0→BPEL Deployment Descriptor.
- Click Next. Verify the BPEL Project name as BPEL_HelloWorld. Click Finish.
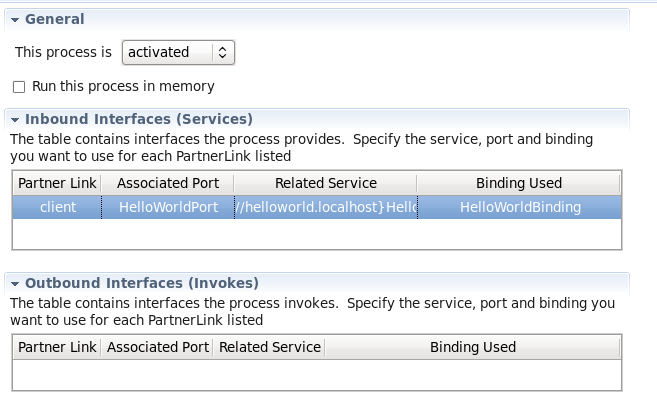
- Double click on the deploy.xml file in the bpelContent folder.
- In the Inbound Interfaces table, select the Partner Link as client, Associate Port as HelloWorldPort. Click on Related Service then other fields will be automatically filled. Save the deploy.xml file.
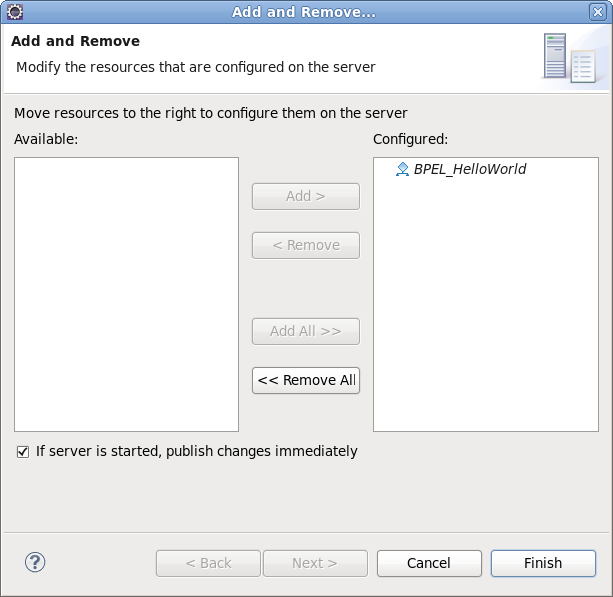
- To deploy the project on the server, right click on the Ode v1.x Server at localhost, select Add and Remove Projects.
- Select the BPEL_HelloWorld/HelloWorld in the Available projects box and click Add. Then, click Finish.
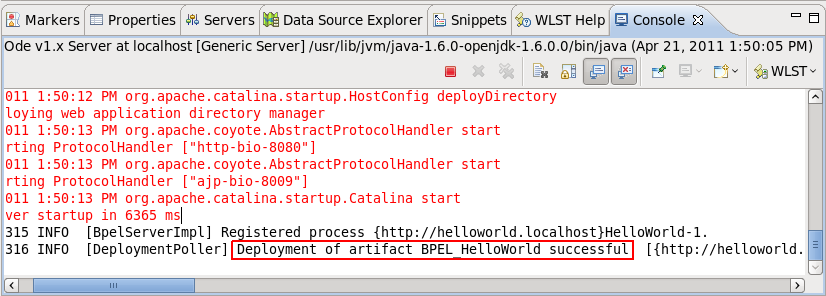
- Start the ODE server. If the deployment was successful, you will see the following output in the console tab.
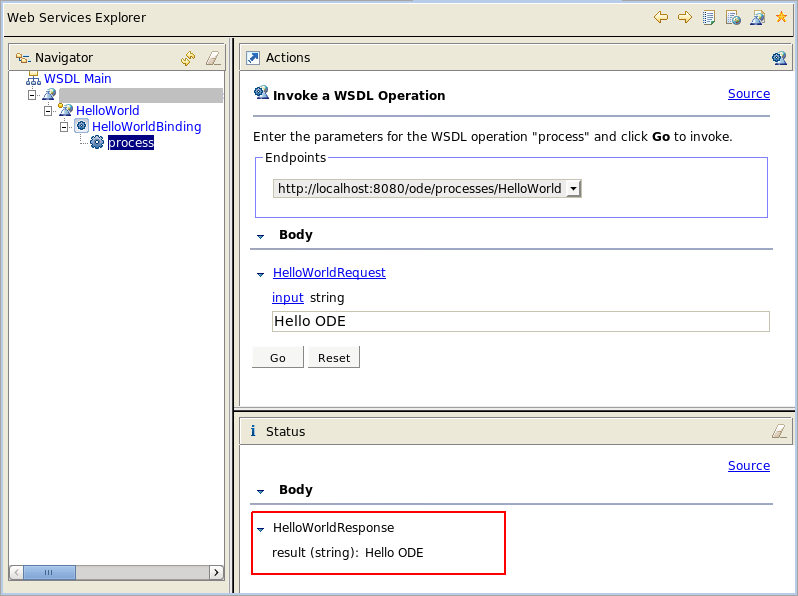
- We will test the project with Web Services Explorer provided by Eclipse. Right click on the HelloWorldArtifacts.wsdl file. Select Web Services→Test with Web Services Explorer.
- Select the operation process. Then, type Hello ODE in the input textbox. If your deployment was success, you will get the same string in the SOAP response.
- Done.
Exercices
- What happens if you select No when you were asked about the variable initialization (step 11)?
- If you want the Output to return the string “Hello “+Input. For example, if the Input is “John”, you will get “Hello John” from the Output. What should you modify from this tutorial?
