WS Client deployment with Eclipse WTP
In this tutorial we will see how Eclipse generate the Client stub.
- We start with the HelloWorld service created in the previous lab.
- File → New → Dynamic Web Project. Name it as HelloWorldClient. Select web service module version as 2.5. Select modify in configuration tab and add Axis2 web services.
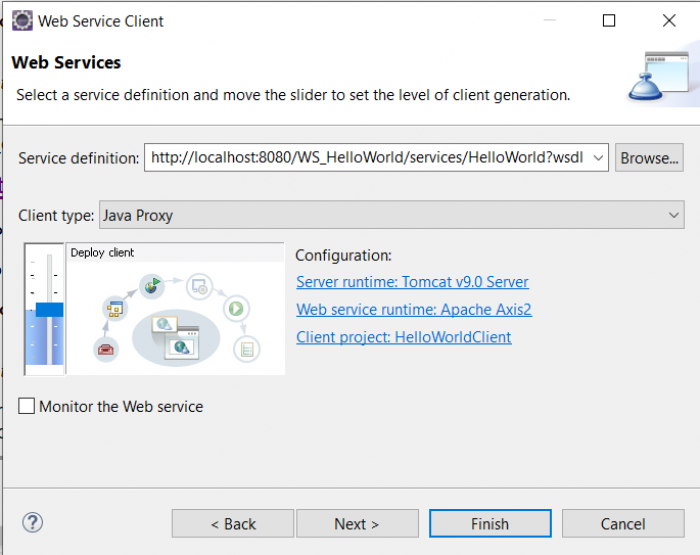
- Click on the HelloWorldClient project, select File → New → Other → Web Service → Web Service Client.
- Click Next.
- Select Browse and enter the following wsdl URI http://localhost:8080/WS_HelloWorld/services/HelloWorld?wsdl.
- In the Configuration part, click on Web service runtime: Apache Axis and select Apache axis2.

- Click OK. Then Next → Finish.
- Inside the HelloWorldClient → Java Resource → src → tps.ws.deployment package, create a new Class named TestClient and select the option public static void main.
- WARNING: We need to move the generated stud and handler java files to the right fold in src and change to JAVA 8 version
- Copy and paste the following code:
package tps.ws.deployment;

import java.rmi.RemoteException;
import tps.ws.deployment.HelloWorldStub.SayHello;

public class TestClient {

	/**
	 * @param args
	 * @throws RemoteException
	 */
	public static void main(String[] args) throws RemoteException {
		// TODO Auto-generated method stub
		HelloWorldStub hwp = new HelloWorldStub();
		SayHello s = new SayHello();
		s.setInput("from client");
		System.out.print(hwp.sayHello(s).get_return());
	}
}
- Right click on the TestClient class, select Run As → Java Application, if you get “Hello from client” in the console, you are successful.
Exercise
- Create and publish a service named “Square” to compute the square of an integer.
- Create a service named “Computation” call the “Square” service to compute the equation: a^2 + b^2.