Preparation of TSP-CSC5061
Table of Contents
- 1. Introduction
- 2. IDE
- 3. Installation of the "game"
- 4. Installation of Photon realtime SDK
- 5. Installation of an Ubuntu (or Xubuntu) virtual machine (To do even if you are using WSL or Linux)
- 6. Linux virtual machine with Vagrant and VirtualBox
- 7. (Only if you have time) Review fundamentals of network programming
- 8. Congratulations! You are done with the preparation of TSP-CSC5061
1 Introduction
TSP-CSC5061 requires preliminary work, so that we do not lose time by waiting for installations during course time.
2 IDE
2.1 Introduction
For TSP-CSC5061, we recommend that you install Visual Studio IDE on your personal computer (running a native Windows or a Windows on a virtual machine because:
- The linter (family of tools designed to statically analyze source code) SonarLint can be easily integrated to Visual Studio, but not CLion which we mention afterwards.
- It will ease our support in case of compilation/linking problems.
- This IDE is widely used in video games industry. Knowing a little bit this IDE can be an advantage.
Notes:
- We rely on Visual Studio 2019. If you have a previous version of Visual Studio, this could mean you use a previous version of the compiler and the linker. This could lead to link problems when we will use Photon library. If you have the possibility, install Visual Studio 2019.
- As we are conscious the some of you may dislike Microsoft, we also support CLion IDE.
- If you use another IDE (in particular Visual Studio Code), we are not sure to make a good support for you.
2.2 OS Windows : Visual Studio
We propose that you install Visual Studio Community because it is free. Now, if you have access to a free programm to get Visual Studio Enterprise, do not hesitate to take advantage of it (We think its interface is a bit nicer).
2.2.1 Download Visual Studio Community installer
- Go to https://visualstudio.microsoft.com/fr/vs/community/
- Click on "Download Visual Studio" button
- Click on "Download" button: You get
vs_Community.exefile, i.e. Visual Studio Community installer.
2.2.2 Installation of Visual Studio and SonarLint
- Do a preliminary cleanup by following the advices Que dois-je faire avant d’installer Visual Studio ? (What should I do before installing Visual Studio?)
- If yoiu want to install Visual Studio on a USB key, check that you have enough space (2,6 GB pour Community plus 1,1 GB of temporary storage).
- Launch the installer you previously downloaded.
- When installation window is displayed, tab "Work load" and select "Desktop development in C++".
- In column "Installation details" on the right, there is no need to select another package.
- By defaut, Visual Studio is installed in
C:\Program Files
    (x86)\Microsoft Visual Studio\2019\Community
, as mentionned at the bottom of the window. To change directory (for instance, to select your D drive or you USB key), click on "Change…" ou on the tab "Installation location". You can:- Specify another installation location.
- Specify if you want to "Keep download cache after installation". As this cache requires 1,02 GB, il may be interesting to uncheck this option or put the cache on a disk where you have room..
- Launch the installation.
- You may be asked to reboot your computer.
- Once Visual Studio is launched, we recommend that you pin it on your task bar in order to be able to launch it quickly.
- Visual Studio welcome window is displayed. We could click on
"Continue without code" at the bottom of "Start" column,
but we will code a "Hello World!" to check installation ran fine.
- Click on button "Create a project": A window "Create a project" opens.
- Click on "Application console", then on buttton "Next".
- Write the desired name for this project, then click on button "Create".
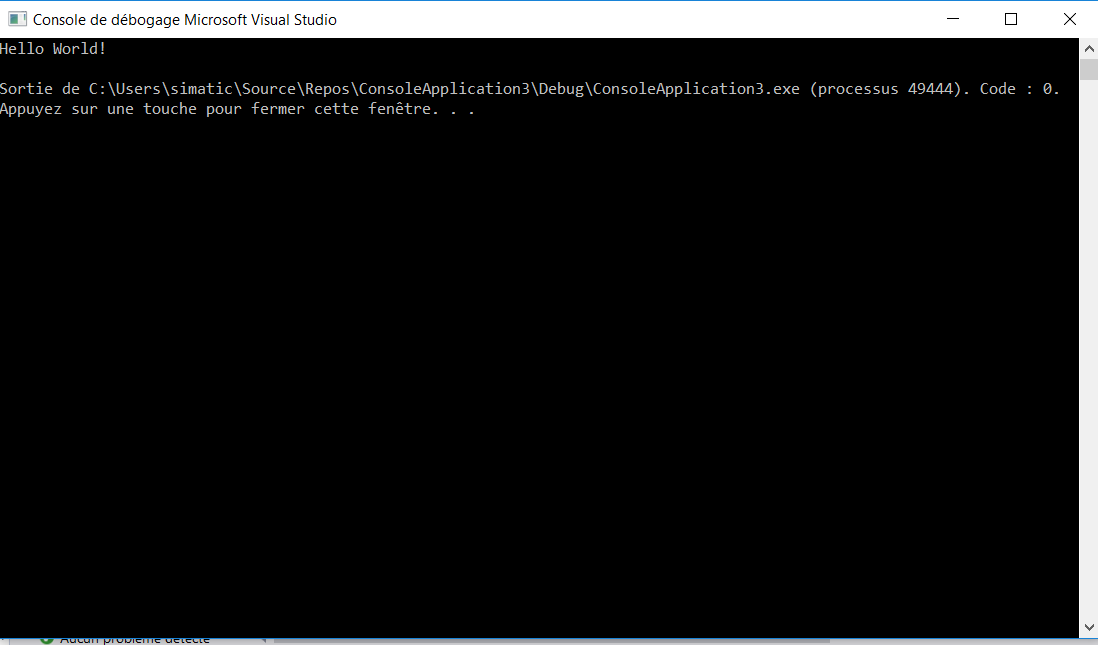
As indicated in one of the comments of the displayed source code, menu Debug > Execute without debugging: You obtain the following window containing message "Hello World!".

Figure 1: Console "Hello World!"
- Yes! Your Visual Studio is operational!
- You still have one step to do: install SonarLint. To do so, just install https://www.sonarlint.org/visualstudio extension, so that every time you open or save a source file, this file will be analyzed and detected errors displayed in Visual Studio.
2.3 OS Linux: Visual Studio ou à la rigueur CLion
2.3.1 VisualStudio on a Windows virtual machine
If you have a Windows virtual machine, followprocedure previously described.
2.3.2 CLion
- Get a free CLion license:
- Follow link CLion
- Click on "Buy"
- Click on "Special offers"
- Click on "Know more" in the category "For students and teachers": a page "Free educational licenses" opens.
- Click on button "Postulate now" at the bottom of the page.
- Fill-up proceudre "Products JetBrains for learning"
- Note: Michel Simatic did not fully check this procedure, as he already has a JetBrain "Teacher" account. For those who will run this procedure, tell Michel Simatic if there are specificities to know.
- Install CLion
2.4 OS MacOS: CLion
2.4.1 CLion
- The standard IDE on Mac is XCode. Install it, if you did not do it already.
- Accoring to this site, CLion is a better IDE than XCode. Moreover, choosing CLion will guarantee that you get better support from the teachers team. So get and install a free CLion license according to the procedure presented in section 3.2.
2.5 Remark about Visual Studio Code
We do not recommend the use of Visual Studio Code as it is less powerfull than Visual Studio and CLion. Ina addition, our support will be very low. Nevertheless, here are the information for installing it :
- Install cmake from https://cmake.org/
- Download the installer from https://code.visualstudio.com, install it and lauch it.
- In https://code.visualstudio.com, click on Extensions. Then, find C/C++ extension and install it. Once the extension window appears in Visual Studio Code, click on button "Install"
- Install also "CMake" and "CMake Tools" extensions.
3 Installation of the "game"
The first labs of TSP-CSC5061 rely on a "game" (we use quotes bescause the code is really simple to avoid polluting comprehension of network code).
- Uncompress SampleSFML.zip in the directory you will use throughout the course.
Apply
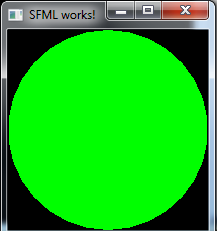
cmakeprocedure of this document. You should obtain the following figure:
Figure 2: "SFML works!" window
- Close the graphic window and the console.
- Now, uncompress Multi_baseGame.zip in the directory you want.
- Apply
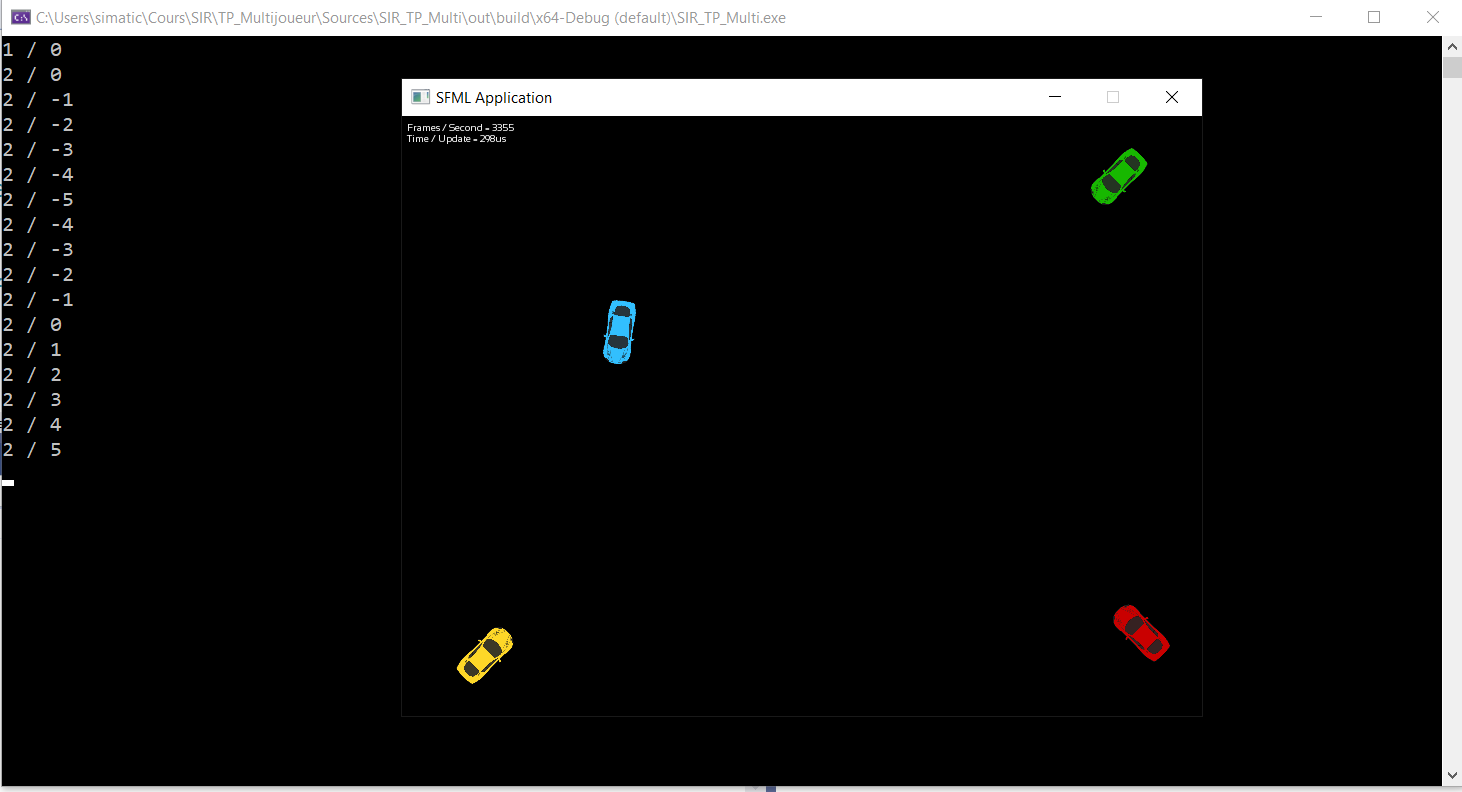
cmakeprocedure of this document. - Compile and run the program: A window with 4 cars is displayed (see
next figure). For the moment, you can only control the blue car:
- Press (and release) up arrow to accelerate.
- Press (and release) down arrow to decelerate.
- Press (and release) left arrow to turn wheels left.
- Press (and release) right arrow to turn wheels right.
Note that console displays the values used for moving your vehicle.

Figure 3: Console and window of the "game"
- Close the graphic window and the console.
4 Installation of Photon realtime SDK
First labs of TSP-CSC5061 use Photon network game engine developed by Exit Games.
- Go to the site https://www.photonengine.com/en-US/Photon
- Subscribe if you haven't yet subscribed.
- Download Windows SDK Realtime :
- Click on
SDKs - Click on
Multiplayer/WindowsorLinux/C++ - Click sur
Windows SDK RealtimeouLinux SDK Realtime - Download
photon-<windows or linux>-sdk_v4-1-16-5.zip - Extract this archive in the directory of your choice (during the
labs, we will suppose that you have uncompressed it in
C:\Softwaredirectory).
- Click on
5 Installation of an Ubuntu (or Xubuntu) virtual machine (To do even if you are using WSL or Linux)
First labs of TSP-CSC5061 witll require the use of an Ubuntu (or Xubuntu if your machine is not powerful enough) virtual machine, with VirtualBox, on you Windows computer.
Please, follow the following steps, even though you regularly use Windows Subsystem for Linux (WSL).
5.1 Preparation
- Get ISO of Ubuntu Desktop 20.04.1 or Xubuntu 20.04 LTS
- Install VirtualBox.
5.2 Creation of your Ubuntu machine
Create a new virtual machine :
- Resource parameters have an influence on the performance of your VM. Recommended values 2GB RAM, 2 CPUs, 128 Mo Video RAM, 3D acceleration.
- Once the VM is created, "mount" the ISO in the virtual and start the VM.
- Follow Ubuntu installation steps.
- You will be asked to create a user account (during the labs, we will
speak about
ubuntu_user) and a password (for conveniency, you should chosse a simple one). - Check that you can access Internet from your virtual machine: For instance, open a web page from a browser.
5.3 Activate shared copy-paste
By default, copy-paste between host computer (the one running VirtualBox) and guest computer (the one running inside VirtualBox is deactivated. To activate it, in the window enclosing your guest machine: Menu Devices > Shared copy-paste > Bidirectional
5.4 Shared folder
VirtualBox Guest Additions is a set of tools which can be installed on your VM to ease its run.
- In your virtual machine, open a terminal and type the following commands:
sudo apt-get install -y build-essential module-assistant gcc make perl dkms
sudo m-a prepare
- In the window enclosing your guest machine: Menu
Devices>Insert Guest Additions CD image... - Follow installation instructions in the VM (Note: if you are using
Xubuntu, open a terminal and type command
sudo
  /media/simatic/VBox_GAs_5.2.18/VBoxLinuxAdditions.run
) - In a VM terminal:
sudo usermod -a -G vboxsf $USER - Shutdown the VM.
- In VM parameters in VirtualBox, add a shared directory which points on the root of Visual Studio projects on which you working.
- NOTE: Tick option "Automatic mount".
- Start the VM.
- In VM file explorer, your directory must be visible. Note: In a
terminal, your shared directory is a subdirectory of
/mediadirectory. - Check that writing a file and reading a file are possible from the VM (Ubuntu) as well as the host (Windows).
6 Linux virtual machine with Vagrant and VirtualBox
With Vagrant, it is possible to automate virtual machine creation.
- First install Vagrant on your OS (this installation may take some time on your machine).
- Create a work directory, for instance
C:\Courses\Vagrant_Lab - Open a terminal in this directory.
- If you are using Windows, do open a Powershell Terminal!
- Protip: To open a Windows PowerShell terminal in a directory, go to this directory with your explorer,
Shift + Right-Click>Open PowerShell Window here.
- Check Vagrant is correctly installed by typing command:
PS C:\Courses\Vagrant_Lab> vagrant version
- Install vagrant-vbguest Vagrant plugin to ease updates of guest additions on the VMs:
PS C:\Courses\Vagrant_Lab> vagrant plugin install vagrant-vbguest
- Initialize a VM running Ubuntu Server 20.04:
PS C:\Courses\Vagrant_Lab> vagrant init bento/ubuntu-20.04
- Note: Vagrant uses a "box" system to specify which OS is to be installed on the VM. Open source "Bento" boxes are officilaly recommended by Vagrant (see https://www.vagrantup.com/docs/boxes.html#official-boxes).
- Start the virtual machine (Note: The first start may take a while, because Linux is automatically installed in the VM):
PS C:\Courses\Vagrant_Lab> vagrant up
- If everything went well, you can interact with the VM:
# To connect to the VM with ssh (Password for vagrant user is: vagrant
PS C:\Courses\Vagrant_Lab> vagrant ssh
# To see SSH configuration (nice to have for debugging)
PS C:\Courses\Vagrant_Lab> vagrant ssh-config
# To stop the VM
PS C:\Courses\Vagrant_Lab> vagrant halt
# To restart the VM
PS C:\Courses\Vagrant_Lab> vagrant reload
# To destroy the VM (Please, wait till we are done using Vagrant to do that)
PS C:\Courses\Vagrant_Lab> vagrant destroy
7 (Only if you have time) Review fundamentals of network programming
If you have time, it would be nice that you review fundamentals of network programming before we start TSP-CSC5061.
To do so:
- Read tutoriel SFML "Communicate with sockets"
- Follow the following sections working on sample code.
7.1 Installation
- Uncompress Client_Server_CPP.zip in the directory you prefer.
- Apply
cmakeprocedure of this document. You should obtain 6 executables.
7.2 Analysis of the code
We will run the application to better understand it:
- Six executables were generated by
cmakeprocedure:tsp_ClientMonoThread.exe,tcp_ClientMultiThread.exeandtcp_serverMultiThread.exeon which we will concentrate in this section.udp_ClientMonoThread.exe,udp_ClientMultiThread.exeandudp_server.exewhich we will use later (but, if you want, you can take a look at the sources).
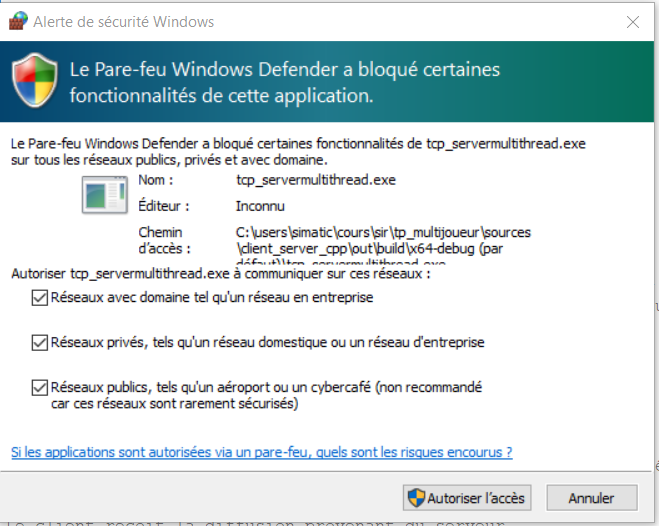
Start multithreaded server with Debug > Execute without debugging: A Windows security alert window related to the firewall may open (see next figure). Tick all checkbox (to authorize your server in whatever network circumstances) and chick on button "Authorize access": The terminal of the server appears.

Figure 4: Window "Windows security alert" related to firewall
- Then, start multithreaded client. Here are commented logs:
# "S:" = Serveur ; "C:" = Client
S: Waiting for connections on port 4096 # Server waits that clients connect to port 4096
   C: My clientName is 'host=PAT13450/pid=42040'
   C: Connect to localhost:4096 # Client tries to connect to local server, on port 4096
                                # Once connection is established, client request its clientId
S: Client '0' is connected and requesting its clientId # Server accepted connection from client and clientId request: It answers.
   C: Received my clientId from server. It is '0' # Client receives its clientId from server.
   C: Broadcasting 60 messages (at frequency of 1 message per second)
   C: Request to broadcast integer: 1 # Client requests the server to broadcast integer value 1 to all clients connected to server.
S: Client '0' requests to broadcast int "1" # Server receives request and handles it.
   C: Client '0' has broadcast (thanks to server) integer: 1 # Client receives broadcast from server.
#
# Etc.
#
   C: Request to broadcast integer: 60
S: Client '0' requests to broadcast int "60"
   C: Client '0' has broadcast (thanks to server) integer: 60
   C: Done # As client has sent the 60 messages it wanted to send, it stops.
S: Client '0' disconnected # Server detects client disconnection.
Now, launch in parallel the exection of two simultaneous multithreaded clients in parallel. Observe that messages are received in the same order by both clients.
Analyze source code of tcp_serverMultiThread.cpp and
tcp_clientMultiThread.cpp (do not care about
tcp_clientMonoThread.cpp ; we will focus on it in next
section). Check that you understand:
- why server is multithreaded,
- what's the use of
mutexVecvariable in the server, - why
vecClientSockandmutexVecvariables are defined as static, - why client is multithreaded.
Note: Method sf::TcpListener::listen() relies on bind() and
listen() system calls which are classically used by network
programmers.
Question to challenge your understanding of this programs. Suppose
that, during the same execution of the server, different clients
connect to the server, request it to send broadcast messages, and then
disconnect. Is it possible that several clients receive the same
clientId? If you are not able to give an answer or to explain why,
do not hesitate to ask on discord.
Other question (No need to implement): How to modify the server in
order to guarantee that no client will ever have the same clientId
than a previous client (except if there are more than 2 billions
clients)?
7.3 Mono-threaded client
tcp_clientMonoThread.cpp contains the code of a monothread
client. This code will be useful when coding our homemade middleware
MyPhoton". You can study it directly to understand how it worls. But
you can take the more challenging path:
- Copy
tsp_clientMultiThread.cpptotcp_clientMonoThread.cpp - Read tutorial on non-blocking sockets.
- Modify
tcp_clientMonoThread.cppso that:- Reading on socket is non-blocking;
- Each time you write on the socket, check whether there is a packet to raead or not. If it is, read it and process it. Then check whether there is another packet waiting;
- Writing on socket takes into account that socket is non-blocking;
- You sleep 1000 millisecondes before sending another packet.
- Check your client works properly with the server.
7.4 (To go even further) Mono-threaded server
By turning our server into a mono-thread server, we get rid of
synchronization problems. In other words, we do not need mutexVec
any more.
Read tutorial "Blocking on a group of sockets" and code example
present in documentation of class sf::SocketSelector: You should be
able to write tcp_serverMonoThread.cpp, a mono-threaded version of
the TCP server.
TODO: Source code of mono-threaded version of the server.
8 Congratulations! You are done with the preparation of TSP-CSC5061
As we say in frenchn, "best things have an end": You are done with the preparation of TSP-CSC5061, congratulations!