Table of Contents
Install WordPress on Amazon Elastic Compute Cloud (EC2)
In this tutorial, you will learn install WordPress on Amazon Elastic Compute Cloud (EC2). First of all, you need to sign up for Amazon Web Services (AWS) here, therefore you can start using Amazon EC2 immediately.
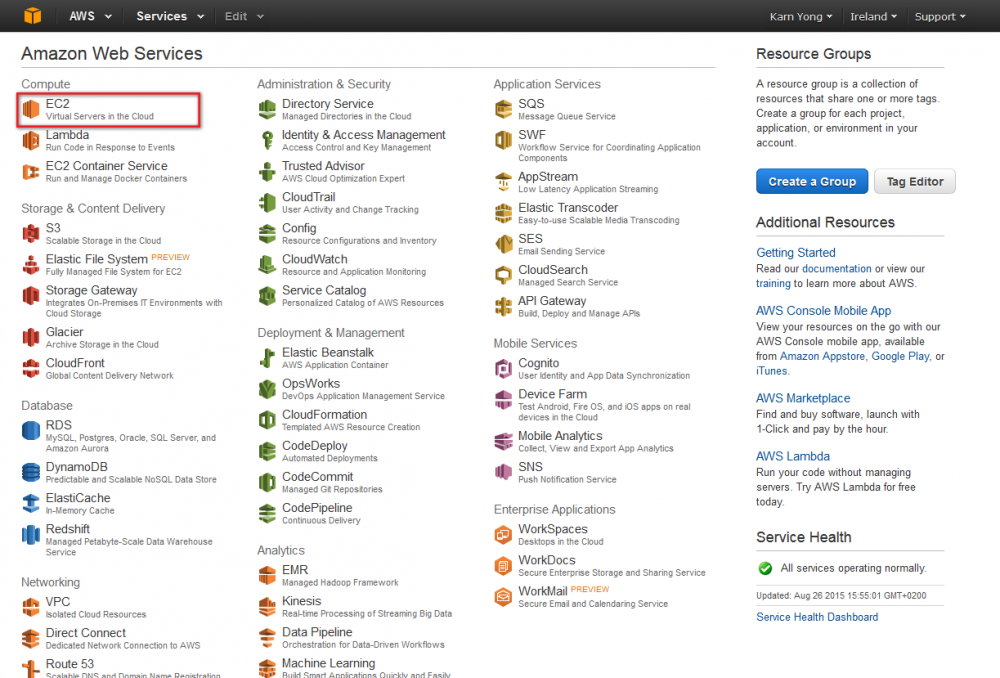
Creating new Amazon EC2 instance
- Lunch your management console and select EC2:
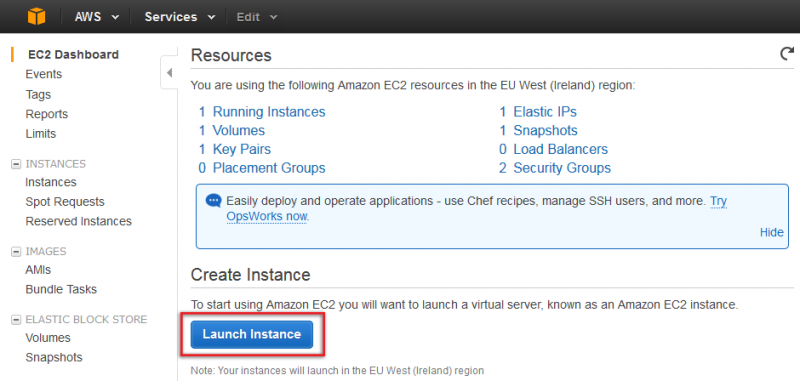
- Lunch a new Amazon EC2 instance (Virtual server).
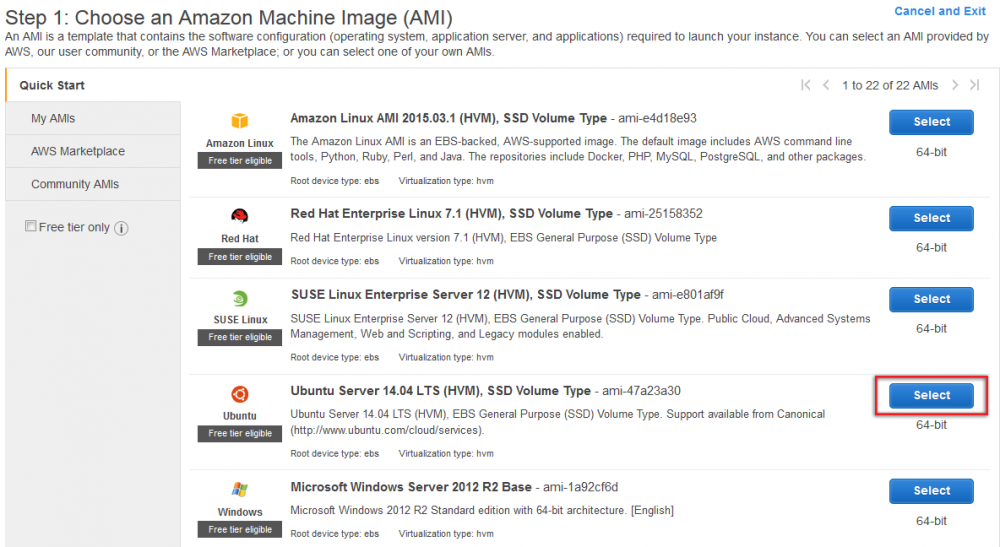
- Select an Amazon Machine Image (AMI) that already contains the software configuration (OS and some applications).
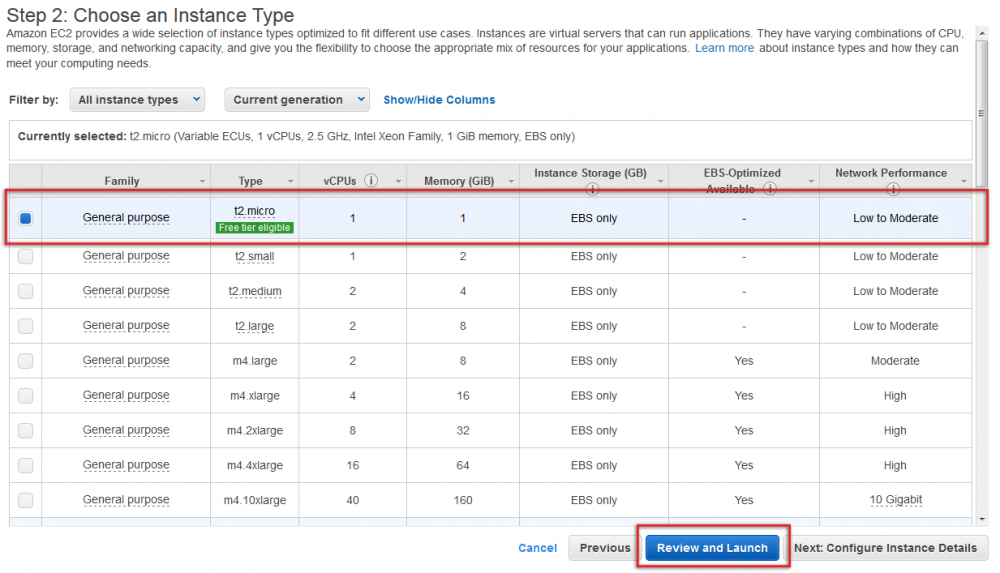
- Choose an Instance Type, you may select t2.micro since it is free.
- Now, it’s a time to launch your EC2 instance!
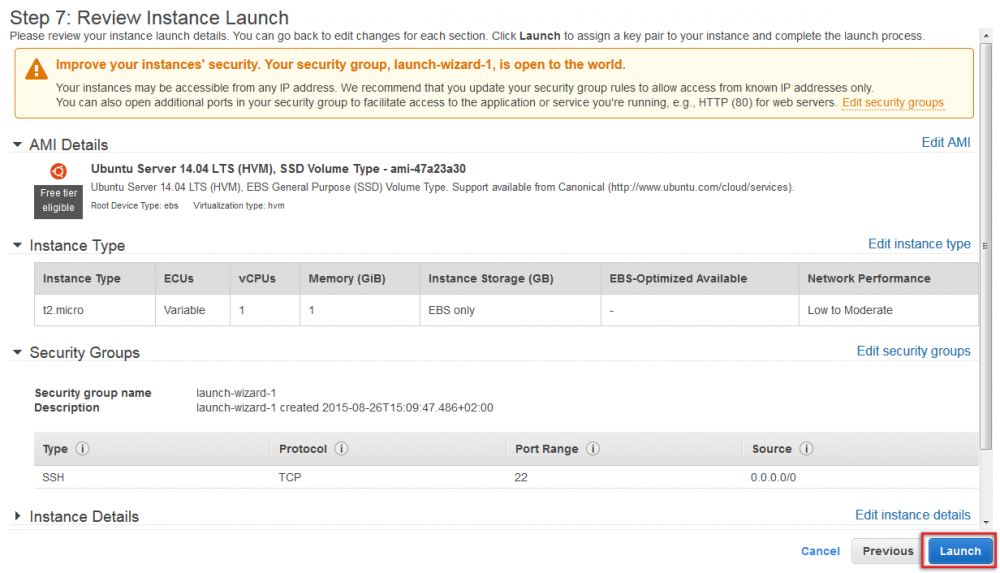
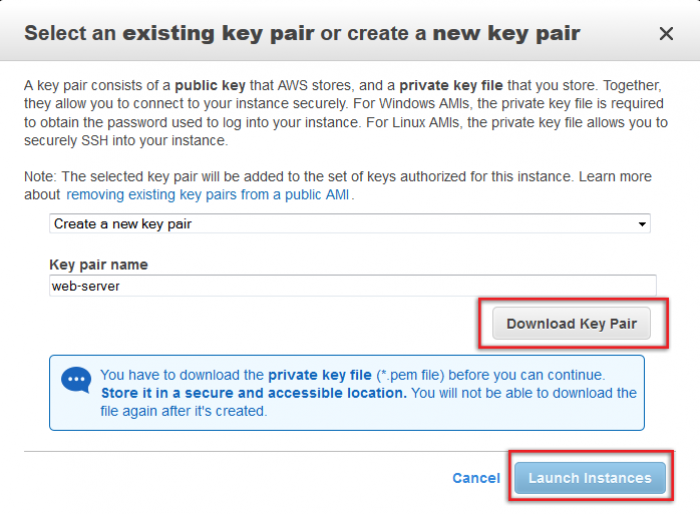
- Enter a Key Pair name and download the Key Pair. You will need to use this for remotely accessing your EC2 instance.
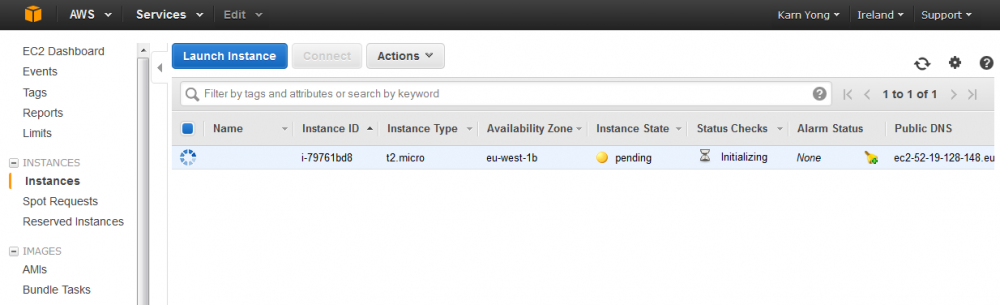
- You will see new instance in the management console.


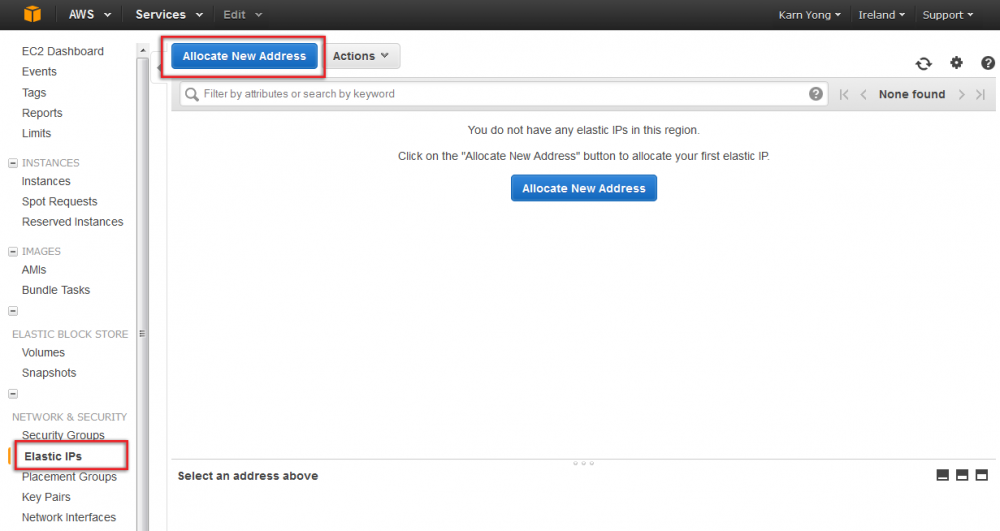
Allocate Elastic IP to the EC2 instance
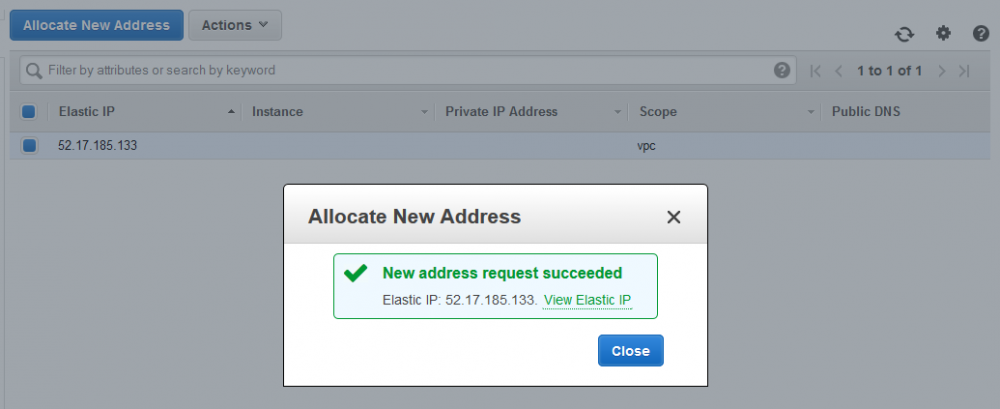
- You can assign an elastic IP for your EC2 instance by navigating to Elastic IPs and click Allocate New Address.
- Now, a new IP address is allocated.
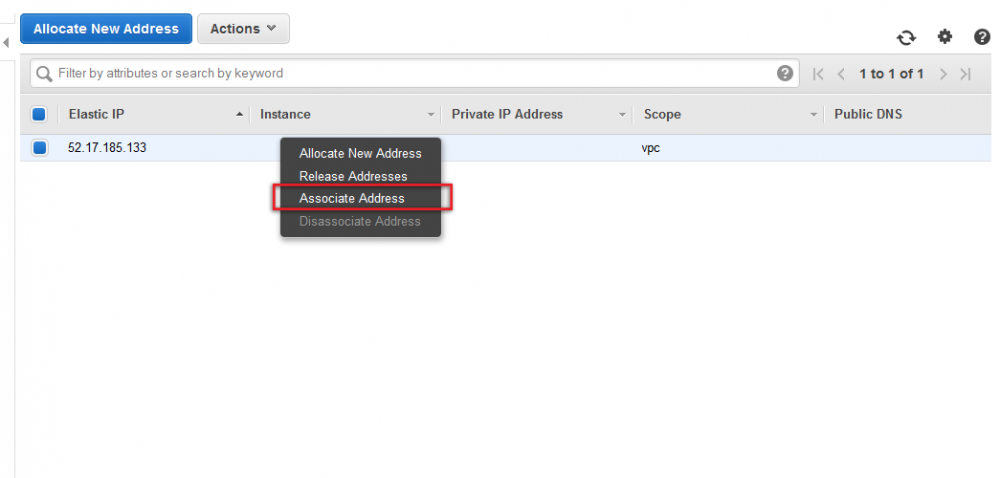
- Associate your new IP address with your EC2 instance by right click on the IP and select Associate Address.
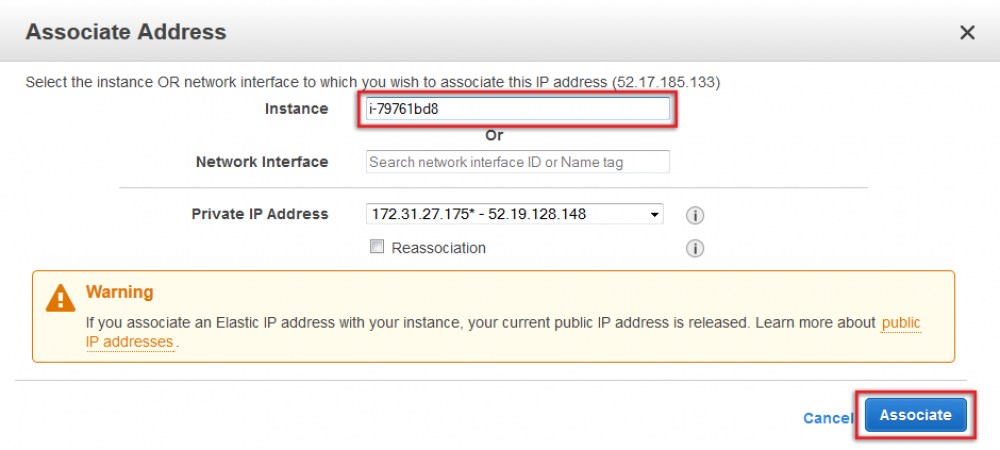
- Select your EC2 instance (simple click the textbox to see the list of your instances), then click Assocaite.
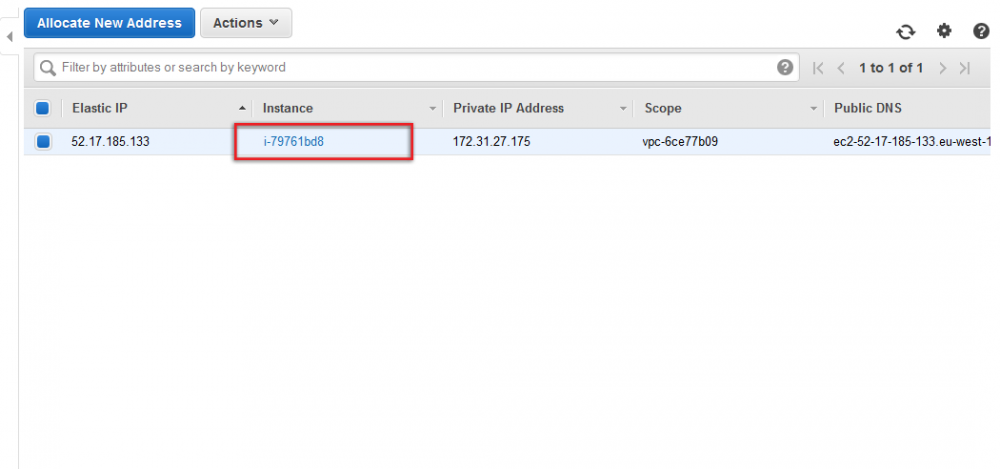
- Finally, an elastic IP is allocated to your EC2 instance.


Connect to your EC2 Instance with ssh
In order to install applications on your EC2 instance, you will need to remotely access to your EC2 instance with SSH.
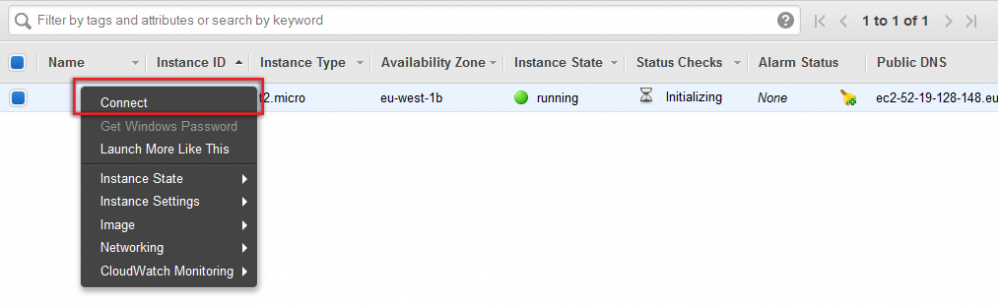
- Firstly, right click on your instance and select Connect.
- You will see how to connect to your instance. Make sure that you have ssh client on your machine. For Windows users, you may simply install Git as mentioned in the tutorial here to have ssh running on the command prompt.

- On the command prompt, go to the directory that contains your key pair file. Perform an operation similar to the previous screenshot to connect to your EC2 instace:
$ ssh -i "web-server.pem" ubuntu@xx.xx.xxx.xxx
The authenticity of host 'xx.xx.xxx.xxx (xx.xx.xxx.xxx)' can't be established.
ECDSA key fingerprint is xx:xx:xx:xx:xx:xx:xx:xx:xx:xx:xx:xx:xx:xx:xx:xx.
Are you sure you want to continue connecting (yes/no)? yes
Warning: Permanently added 'xx.xx.xxx.xxx' (ECDSA) to the list of known hosts.
Welcome to Ubuntu 14.04.2 LTS (GNU/Linux 3.13.0-48-generic x86_64)
...
ubuntu@ip-xxx-xx-xx-xxx:~$


Install Apache
- Install apache web server using the following operations:
$ sudo apt-get update
$ sudo apt-get install apache2
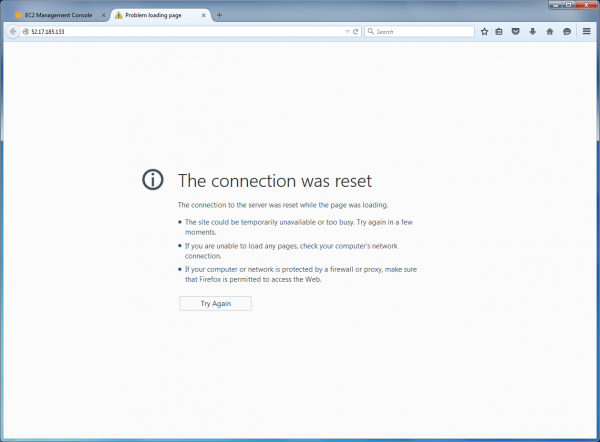
- Navigate to: http://your_elastic_IP_address. It doesn’t work! Don’t worry, the next step with solve your problem.

Edit Security Group
By default, your instance could be access using only SSH (port: 22). You need to configure security group of your EC2 instance.
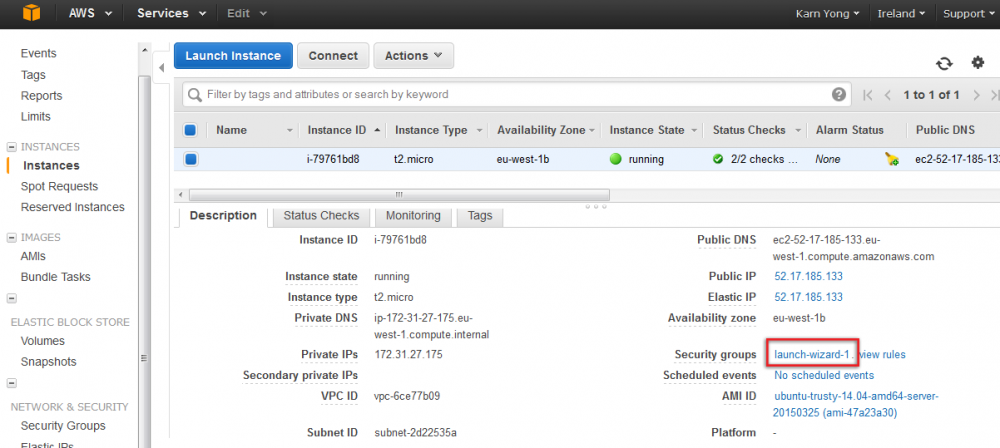
- Navigate to your management console, select your EC2 instance and click on one of your Security groups.
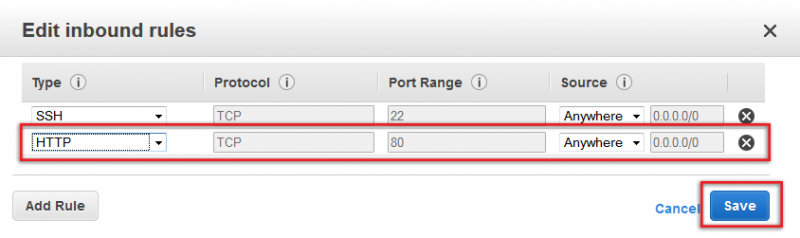
- Now you are navigated to Security Group, select Inbound and click Edit.
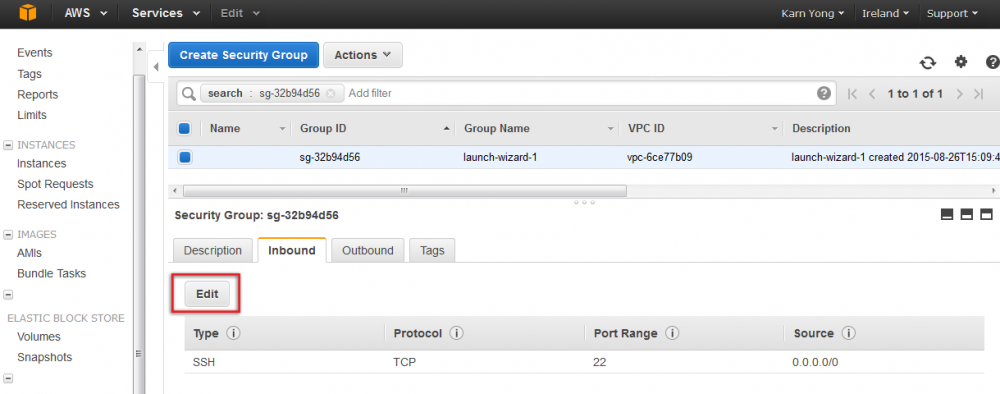
- Add HTTP to inbound rules and click Save.


Install MySQL
- Install MySQL by running:
$ sudo apt-get install mysql-server php5-mysql
Install PHP
- Install PHP by running:
$ sudo apt-get install php5 libapache2-mod-php5 php5-mcrypt
- Edit the file /etc/apache2/mods-enabled/dir.conf by running:
$ sudo nano /etc/apache2/mods-enabled/dir.conf
It will look like this:
<IfModule mod_dir.c>
  DirectoryIndex index.html index.cgi index.pl index.php index.xhtml index.htm
</IfModule>
We want to move the PHP index file highlighted above to the first position after the DirectoryIndex specification, like this:
<IfModule mod_dir.c>
  DirectoryIndex index.php index.html index.cgi index.pl index.xhtml index.htm
</IfModule>
- Restart apache by running:
$ sudo service apache2 restart
- Create /var/www/html/info.php by running:
$ sudo nano /var/www/html/info.php
This will open a blank file. We want to put the following text, which is valid PHP code, inside the file:
<?php
  phpinfo();
?>

Create a MySQL Database and User for WordPress
Running the following commands:
$ mysql -u root -p
$ CREATE DATABASE wordpress;
$ CREATE USER wordpressuser@localhost IDENTIFIED BY 'password';
$ GRANT ALL PRIVILEGES ON wordpress.* TO wordpressuser@localhost;
$ exit
Install WordPress
- Running the following commands to go to your home directory, download and extract wordpress:
$ cd ~
$ wget http://wordpress.org/latest.tar.gz
$ tar xzvf latest.tar.gz
- We should also get a few more packages that we need. We can get these directly from Ubuntu’s default repositories after we update our local package index:
$ sudo apt-get update
$ sudo apt-get install php5-gd libssh2-php
This will allow you to work with images and will also allow you to install plugins and update portions of your site using your SSH login credentials.
- Configure WordPress:
$ cd ~/wordpress
$ cp wp-config-sample.php wp-config.php
$ nano wp-config.php
Edit wp-config.php as follow:
// ** MySQL settings - You can get this info from your web host ** // /** The name of the database for WordPress */ define('DB_NAME', 'wordpress'); /** MySQL database username */ define('DB_USER', 'wordpressuser'); /** MySQL database password */ define('DB_PASSWORD', 'password'); - The location of the document root in the Ubuntu 14.04 LAMP guide is /var/www/html/. We can transfer our WordPress files there by the following commands:
$ sudo rsync -avP ~/wordpress/ /var/www/html/
$ cd /var/www/html
$ sudo chown -R www-data:www-data *
- Manually create the uploads directory beneath the wp-content directory at our document root. This will be the parent directory of our content:
$ sudo mkdir /var/www/html/wp-content/uploads
$ sudo chown -R www-data:www-data /var/www/html/wp-content/uploads
Write your blog on WordPress


