Table of Contents
Automate deployment of applications on Amazon EC2 with Cloudify
In this tutorial, you will learn how to use Cloudify to install a web application on Amazone EC2. Cloudify’s DSL (Domain Specific Language) is following OASIS TOSCA (Topology and Orchestration Specification for Cloud Applications). TOSCA has a simplified YAML profile and Cloudify is following this YAML syntax.
Create new user on Amazon IAM
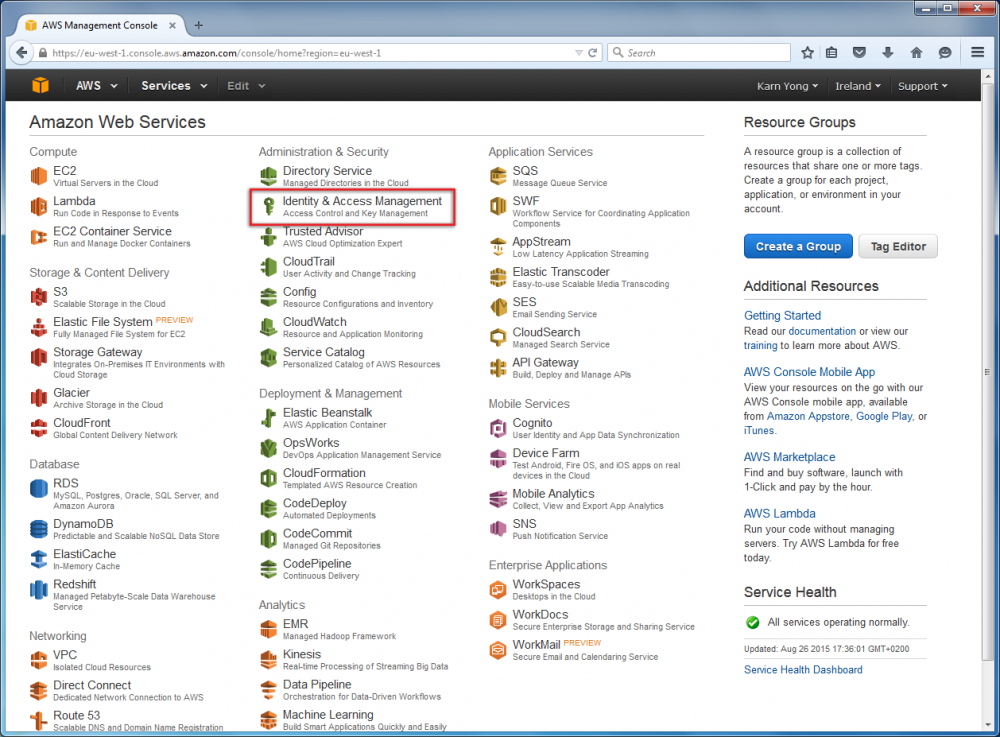
Identity and Access Management (IAM) is a web service that helps you securely control access to AWS resources for your users. Cloudify will use this web service to access to the cloud resources. First of all, we need to create a new IAM user.
- Navigate to Identity & Access Management
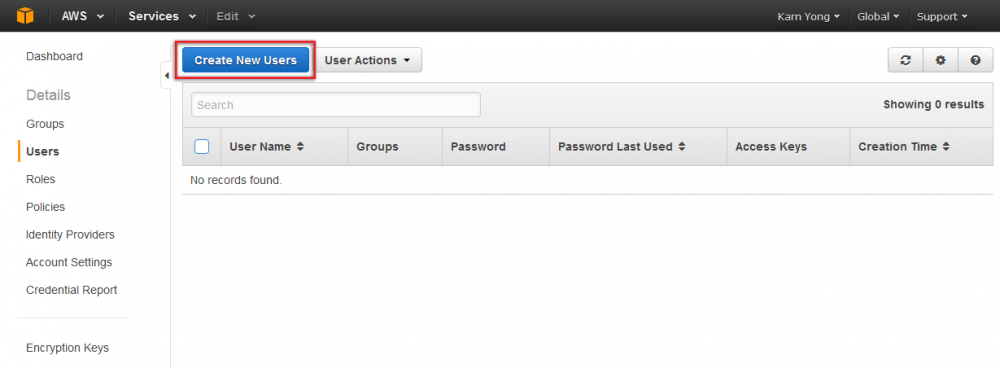
- Click Create New Users.
- Enter new user name.
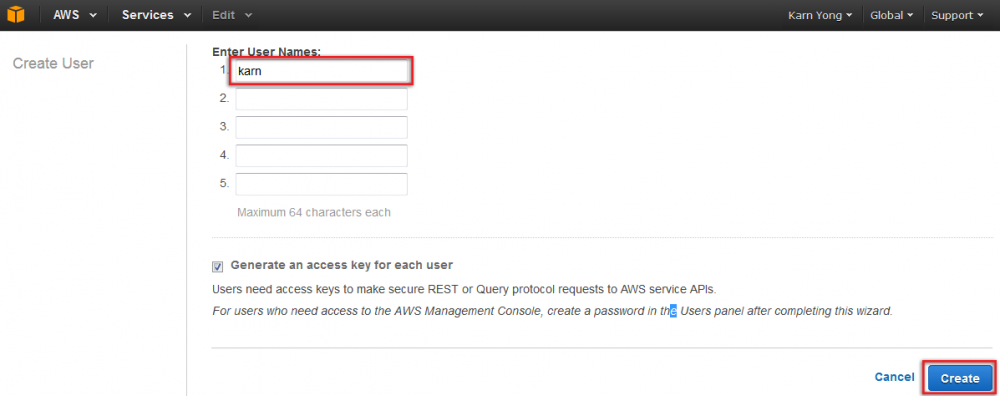
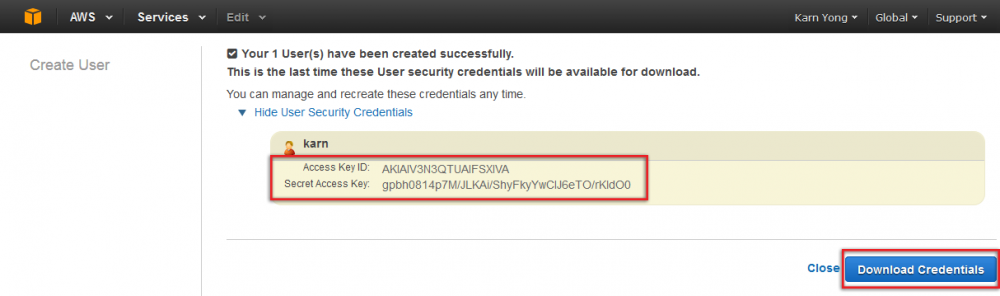
- You will receive access key id and secret access key. Download this information to your machine by simply click Download Credentials, or just save them into a text file.
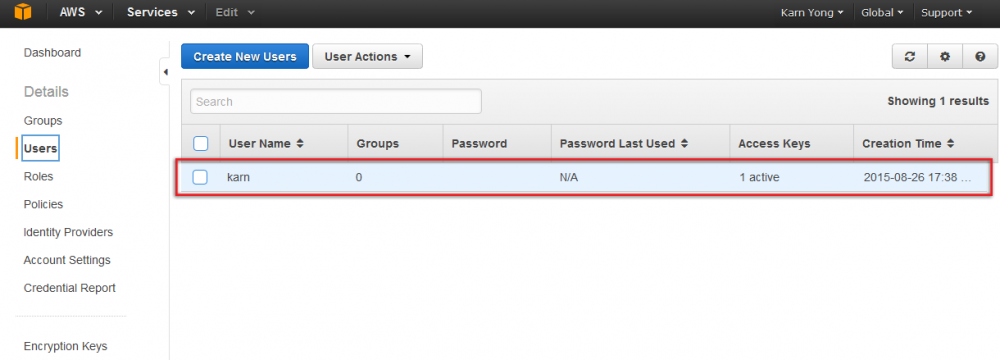
- Now, we need to configure permissions to thee user. Select Users.
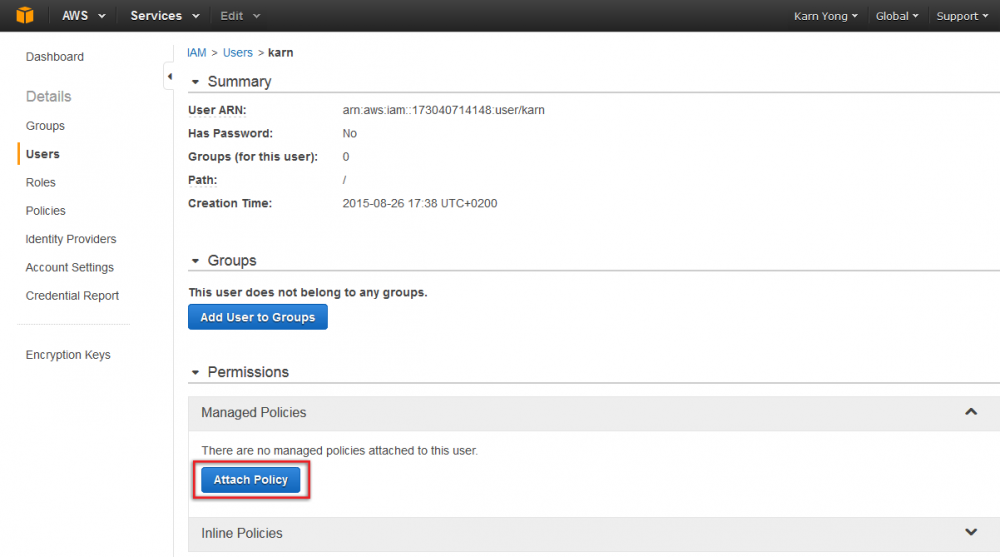
- Click Attach Policy.
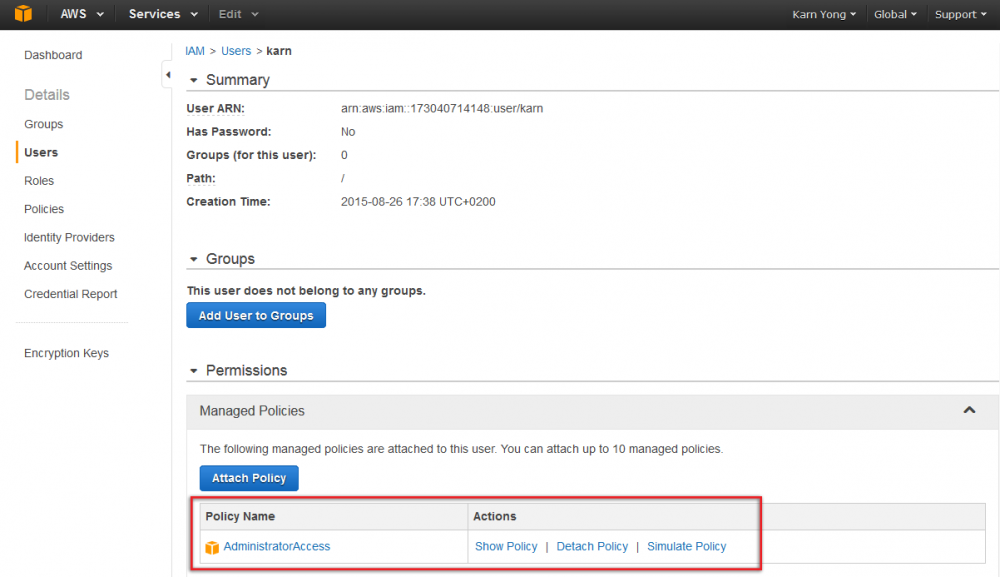
- Search for AdminstratorAccess, select and click Attach Policy.

- Thereafter, you will have this policy attached to your IAM account.


Install Python and Cloudify
- Install cloudify 3.2.1 from http://getcloudify.org/downloads/previous_ga_versions.html or follow the instruction from http://getcloudify.org/guide/3.2/installation.html.
Deploy Cloudify Manager on EC2 Instance
- Only for windows, configure Git on Windows to properly handle line endings:
$ git config --global core.autocrlf true
- Create a new working directory:
$ mkdir cfy
$ cd cfy
- Clone sample Cloudify blueprints from the github:
$ git clone https://github.com/cloudify-cosmo/cloudify-manager-blueprints
$ cd cloudify-manager-blueprints
$ git checkout tags/3.2.1
$ cd ..
- Initialize Cloudify on your working directory and install required plugins for AWS EC2 blueprint:
$ cfy init
$ cfy local install-plugins -p cloudify-manager-blueprints/aws-ec2/aws-ec2-manager-blueprint.yaml
- Create cloudify-manager-blueprints/aws-ec2/inputs.yaml, change aws_access_key_id and aws_secret_access_key according to your IAM account:
aws_access_key_id: 'AKIAIV3N3QTUAIFSXIVA'
aws_secret_access_key: 'gpbh0814p7M/JLKAi/ShyFkyYwCIJ6eTO/rKldO0'
image_id: 'ami-47a23a30'
instance_type: 't2.medium'
manager_keypair_name: 'cloudify-manager-kp'
agent_keypair_name: 'cloudify-agent-kp'

use_existing_manager_group: false
use_existing_agent_group: false
use_existing_manager_keypair: false
use_existing_agent_keypair: false
manager_key_pair_file_path: ~/.ssh/cloudify-manager-kp.pem
agent_key_pair_file_path: ~/.ssh/cloudify-agent-kp.pem
mananger_security_group_name: cloudify-manager-security-group
agent_security_group_name: cloudify-agent-security-group
manager_server_name: cloudify-manager-server
manager_server_user: ubuntu
agents_user: ubuntu
# If no region is provided, the plugin will fallback to the default region for your user.
ec2_region_name: 'eu-west-1'
- Bootstrap a Cloudify Manager:
$ cfy bootstrap --install-plugins -p cloudify-manager-blueprints/aws-ec2/aws-ec2-manager-blueprint.yaml -i cloudify-manager-blueprints/aws-ec2/inputs.yaml
In case you tried bootstrap before, make sure to delete 2 files, HOME_DIRECTORY\.ssh\cloudify-agent-kp.pem and HOME_DIRECTORY\.ssh\cloudify-manager-kp.pem, before execute the command.
- To validate this installation, perform the following command:
$ cfy status
Getting management services status... [ip=xx.xx.xxx.xxx]

Services:
+--------------------------------+--------+
|            service             | status |
+--------------------------------+--------+
| Riemann                        |   up   |
| Celery Management              |   up   |
| Manager Rest-Service           |   up   |
| AMQP InfluxDB                  |   up   |
| RabbitMQ                       |   up   |
| Elasticsearch                  |   up   |
| Webserver                      |   up   |
| Logstash                       |   up   |
+--------------------------------+--------+
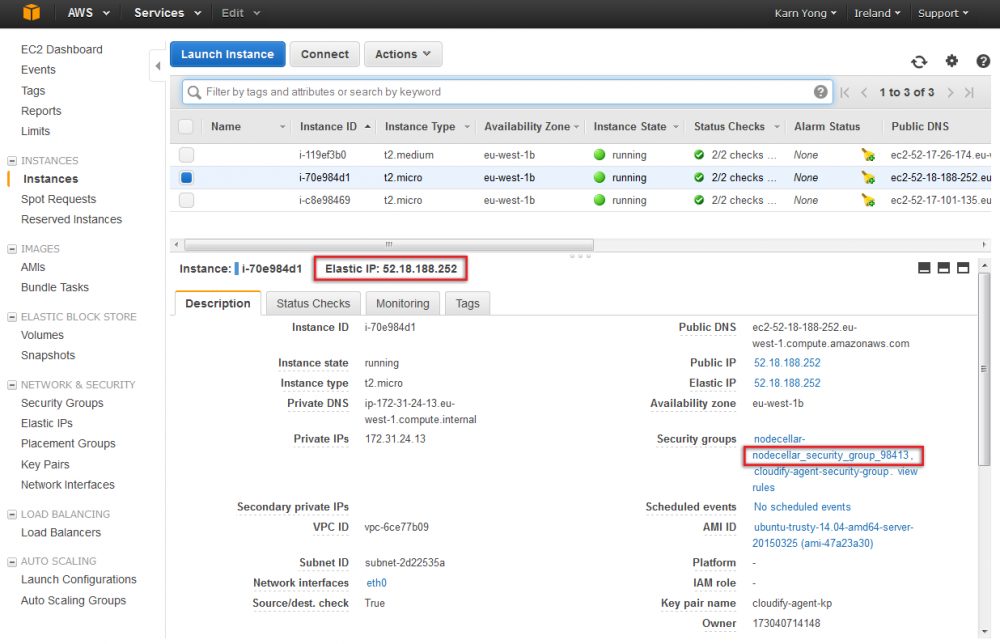
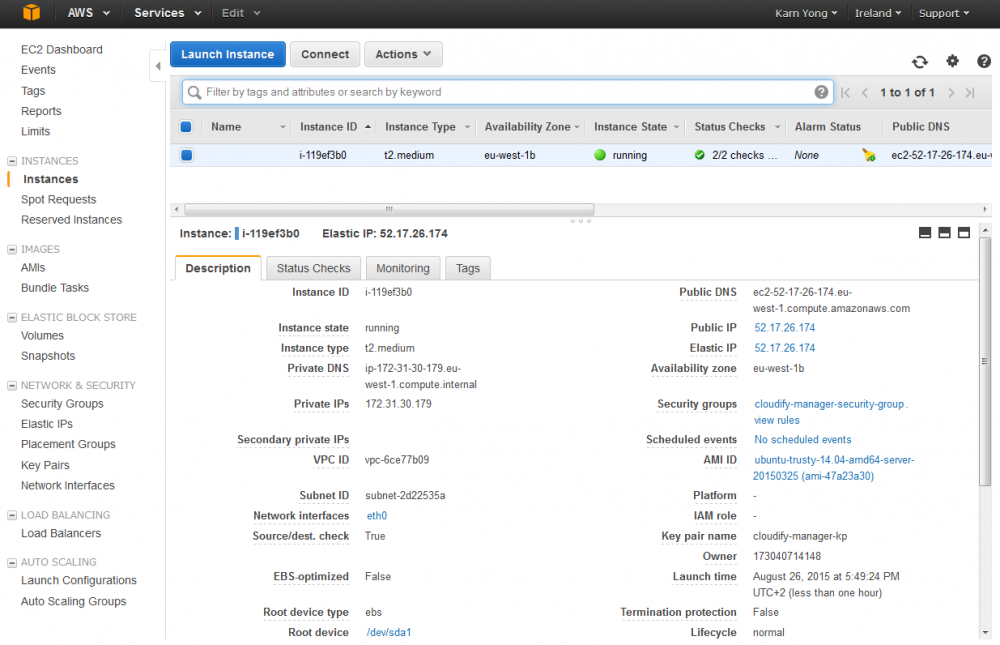
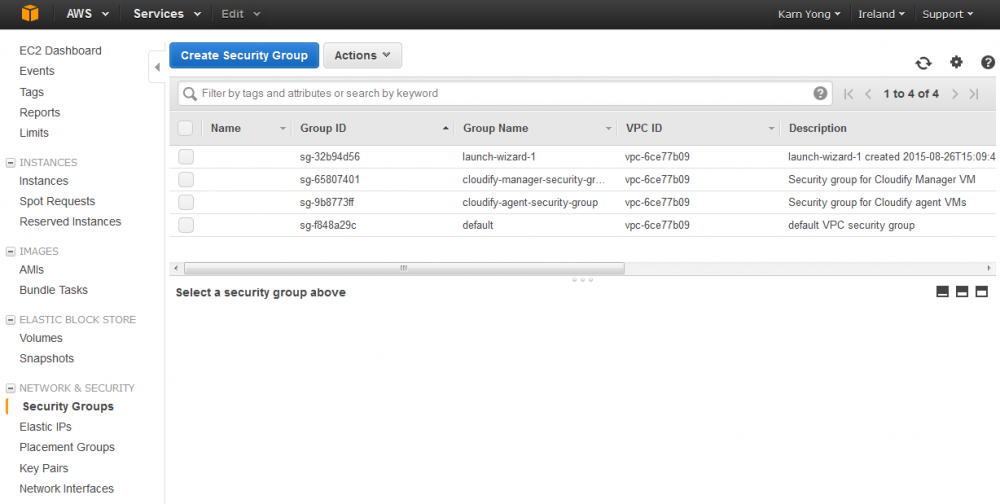
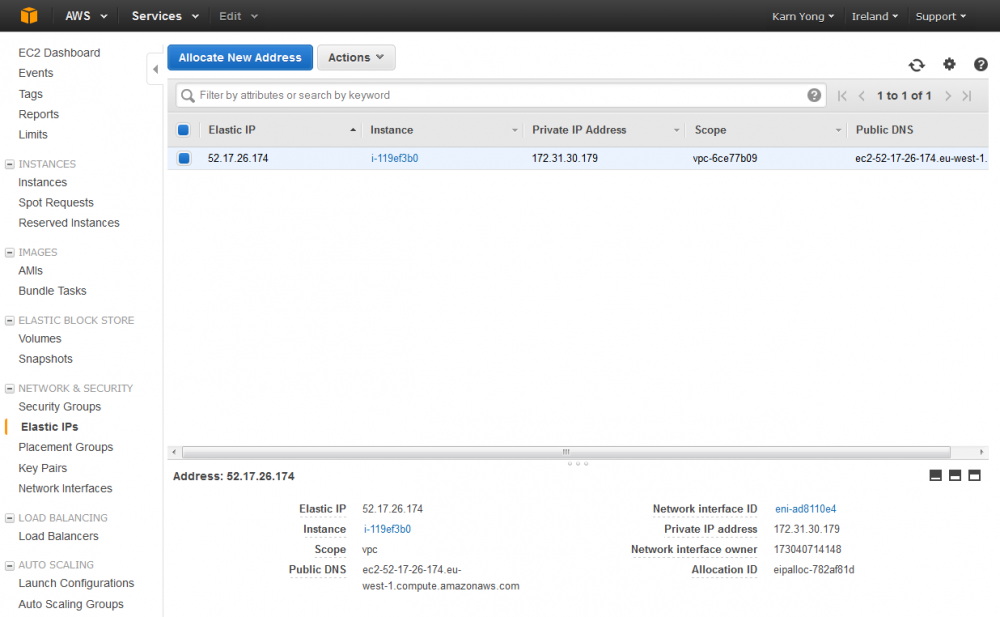
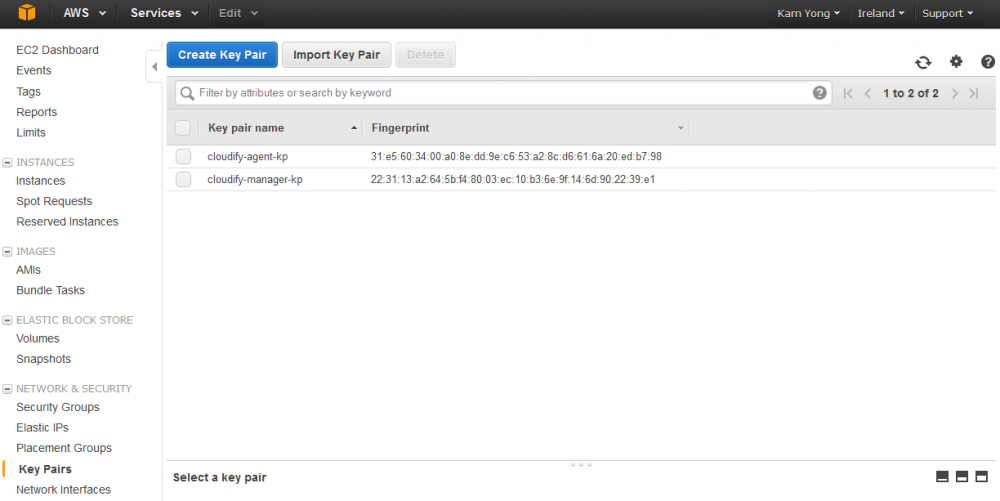
- Navigate to AWS console, and see your newly created instance, IP address, security groups and key pairs of your Cloudify Manager.


Deploy Nodecellar via Cloudify Manager
- Clone a sample nodecellar web application from the Git hub.
- For Unix:
$ git clone https://github.com/cloudify-cosmo/cloudify-nodecellar-example
$ cd cloudify-nodecellar-example
$ git checkout tags/3.2.1
$ cd ..
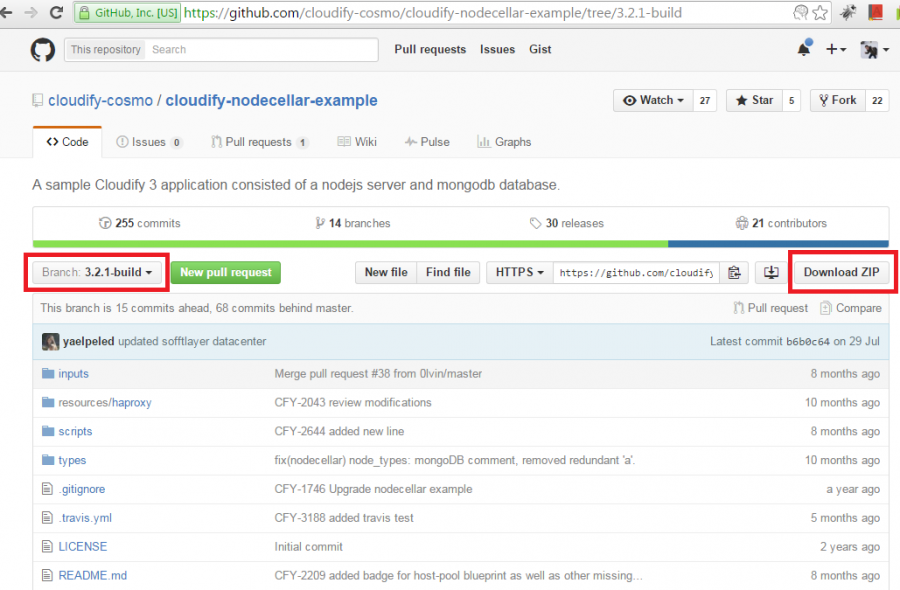
- For Windows, to prevent the bug of git when cloning the UNIX script files, navigate to https://github.com/cloudify-cosmo/cloudify-nodecellar-example select the branch 3.2.1-build and download it as a zip file, extract it to your working directory.
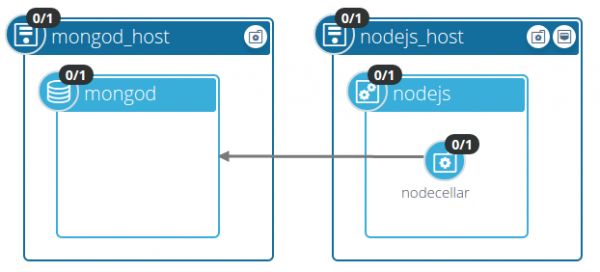
- Look at cloudify-nodecellar-example/aws-ec2-blueprint.yaml, it contains 2 servers for Node JS Server and Mongo Database.
node_templates:

  mongod_host:
    type: nodecellar.nodes.MonitoredServer
    properties:
      image_id: { get_input: image }
      instance_type: { get_input: size }
    relationships:
      - type: cloudify.aws.relationships.instance_connected_to_security_group
        target: mongod_security_group

  nodejs_host:
    type: nodecellar.nodes.MonitoredServer
    properties:
      image_id: { get_input: image }
      instance_type: { get_input: size }
    relationships:
      - type: cloudify.aws.relationships.instance_connected_to_security_group
        target: nodecellar_security_group
      - type: cloudify.aws.relationships.instance_connected_to_elastic_ip
        target: nodecellar_elasticip

  mongod:
    type: nodecellar.nodes.MongoDatabase
    properties:
      port: 27017
    interfaces:
      cloudify.interfaces.lifecycle:

    relationships:
      - type: cloudify.relationships.contained_in
        target: mongod_host

  nodejs:
    type: nodecellar.nodes.NodeJSServer
    relationships:
      - type: cloudify.relationships.contained_in
        target: nodejs_host

  nodecellar:
    type: nodecellar.nodes.NodecellarApplicationModule
    properties:
      port: 8080
    relationships:

      ################################
      # Setting the mongo connection
      ################################

      - type: node_connected_to_mongo
        target: mongod

      ################################
      # Setting the nodejs connection
      ################################

      - type: node_contained_in_nodejs
        target: nodejs
It can be visualize as follow:
- Upload this blueprint to the cloudify manager.
$ cfy blueprints upload -b nodecellar -p cloudify-nodecellar-example/aws-ec2-blueprint.yaml
- Create a new file cloudify-nodecellar-example/inputs/aws-ec2.yaml with the following content:
image: 'ami-47a23a30'
size: 't2.micro'
agent_user: 'ubuntu'
- To reduce deployment time, edit cloudify-nodecellar-example/scripts/nodejs/install-nodejs.sh:
...
download https://github.com/KarnYong/cloudify-nodecellar-tars/raw/master/${NODEJS_TARBALL_NAME} ${NODEJS_TARBALL_NAME}
...
And edit cloudify-nodecellar-example/scripts/mongo/install-mongo.sh:
... download https://github.com/KarnYong/cloudify-nodecellar-tars/raw/master/${MONGO_TARBALL_NAME} ${MONGO_TARBALL_NAME} ... - Create a deployment by running the command:
$ cfy deployments create -b nodecellar -d nodecellar --inputs cloudify-nodecellar-example/inputs/aws-ec2.yaml
- Install a deployment by executing the following command:
$ cfy executions start -w install -d nodecellar
- Validate your installation by the following commands:
$ cfy node-instances list
$ cfy node-instances get --node-instance-id NODE_INSTANCE_ID
Getting node instance with ID: 'NODE_INSTANCE_ID' [manager=xx.xx.xx.xxx]

Instances:
+---------------------------------+---------------+-------------------+---------------------------+---------+
|                id               | deployment_id |      host_id      |          node_id          |  state  |
+---------------------------------+---------------+-------------------+---------------------------+---------+
|           nodejs_d086c          |   nodecellar  | nodejs_host_719ab |           nodejs          | started |
|   mongod_security_group_0057e   |   nodecellar  |        None       |   mongod_security_group   | started |
| nodecellar_security_group_98413 |   nodecellar  |        None       | nodecellar_security_group | started |
|        mongod_host_4ed42        |   nodecellar  | mongod_host_4ed42 |        mongod_host        | started |
|    nodecellar_elasticip_5e574   |   nodecellar  |        None       |    nodecellar_elasticip   | started |
|           mongod_1f6a4          |   nodecellar  | mongod_host_4ed42 |           mongod          | started |
|        nodejs_host_719ab        |   nodecellar  | nodejs_host_719ab |        nodejs_host        | started |
|         nodecellar_8e0f2        |   nodecellar  | nodejs_host_719ab |         nodecellar        | started |
+---------------------------------+---------------+-------------------+---------------------------+---------+
- Navigate to EC2 console, you will see two new instances, one for Node JS server and another one for mongo database. Check the ip address of your Node JS server.