Deploy a servlet based web service on a Tomcat server
In this tutorial, we will see how to deploy a simple RESTful web service on a Tomcat server instead of runing it as a standalone application.
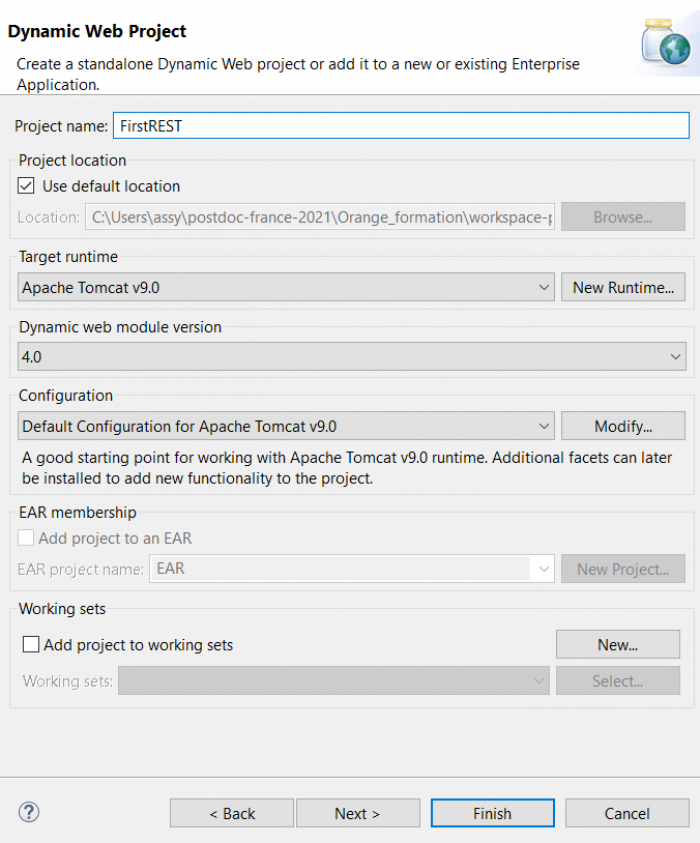
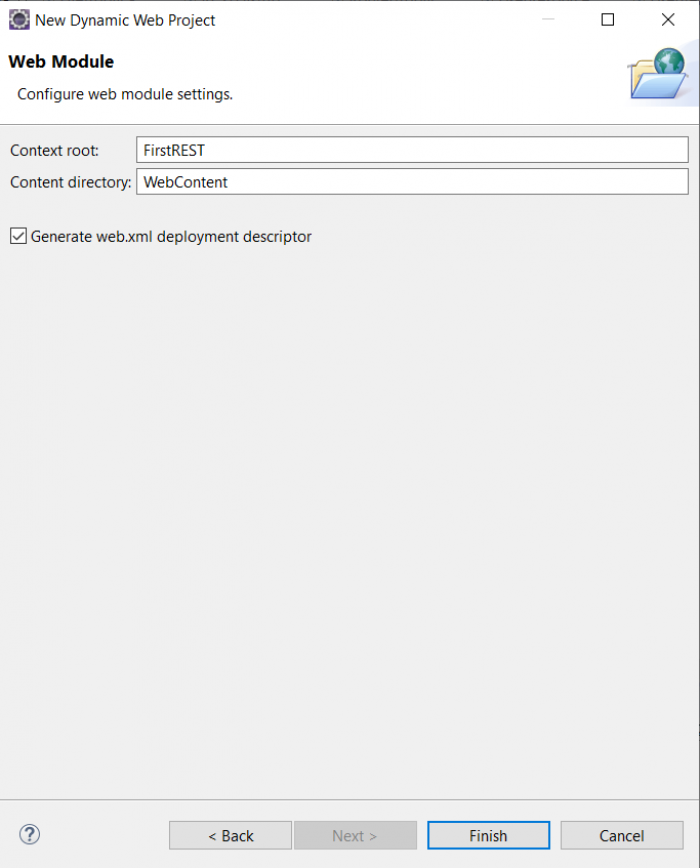
- Create a new Dynamic Web Project, named “FirstRest”: File → New → Other → Dynamic Web Project, name it, select the appropriate Tomcat in the “Target runtime”. In my case, I select Tomcat v9.0 and Dynamic web module version 4.0. Then, click Next→Next, then select web.xml generation. Finish.
- In the created project, there is a folder call WebContent. Copy the org.restlet.jar and org.restlet.ext.servlet files to the WebContent\WEB-INF\lib folder.
- Create the “fifthRest” package under the src folder and copy three files: “RouterApplication”, “UserResource” and “UserItemResource” created in the previous tutorial to this package. Remember to check that there is no error in the project.
- Open the “web.xml” file in the WebContent\WEB-INF folder and add the following just before the </web-app> tag.
	<!-- Application class name -->
	<context-param>
		<param-name>org.restlet.application</param-name>
		<param-value>fifthRest.RouterApplication</param-value>
	</context-param>

	<!-- Restlet adapter -->
	<servlet>
		<servlet-name>RestletServlet</servlet-name>
		<servlet-class>org.restlet.ext.servlet.ServerServlet</servlet-class>
	</servlet>

	<!-- Catch all requests -->
	<servlet-mapping>
		<servlet-name>RestletServlet</servlet-name>
		<url-pattern>/*</url-pattern>
	</servlet-mapping>
- Export the project to a war file, named “FirstREST.war”: File → Export → WAR file, name it and Finish.
- Publish the FirstREST.war file to your Tomcat web server. A simple way is copying it to [your tomcat]/webapps directory.
- (Re)start your Tomcat and navigate: http://[server address]:[port]/FirstRest/users/[uid]/items, for example http://localhost:8080/FirstRest/users/123/items.
- You can also test the application by runing it on the Tomcat runtime environment set up in Eclipse by selecting the project, then Run → Run As → Run on server or Alt+Shift+X,R.
- Done.
