Table of Contents
Testing a real world API
In this tutorial, we will explore more advanced features of API testing in Postman by testing a real world API which is Trello API.
- Go to https://trello.com/ and sign up for a free account. Make sure to use a free account that does not require to enter any credit card information.
- Let's play a bit with Trello before start invoking its API.
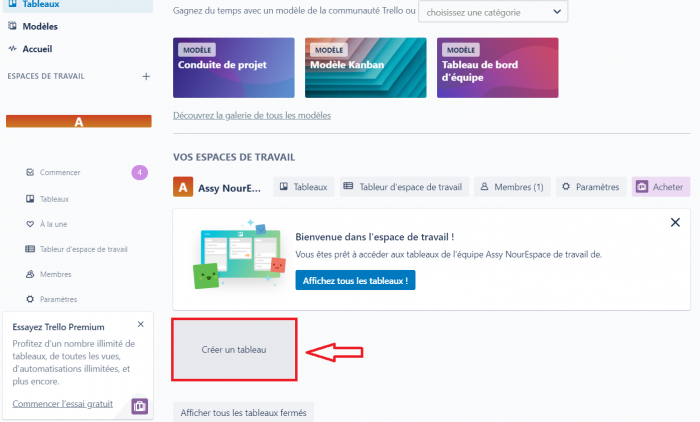
- Click on Tableaux, then Creer un tableau. Name it my-board.
- Click on Ajouter une liste. Name it My TODOs.
- In My TODOs, click on ajouter une carte. Enter whatever (e.g. finish API labs).
- Add another list by clicking on Ajouter une liste. Name it Done.
- Move finish API labs card from My TODOs to Done.

- Let's now interact with Trello via its API.
Trello API
- Trello API can be found on https://developer.atlassian.com/cloud/trello/
- Documentation about the API can be found by clicking on Reference.
- Let's invoke the create board API which can be found on https://developer.atlassian.com/cloud/trello/rest/api-group-boards/#api-boards-post.
- Go to postman and create a new collection named Trello. Create a new request name it Create board.
- Change the method from GET to POST. Enter the API endpoint: https://api.trello.com/1/boards
- Click on Body tab. Choose x-www-form-urlencoded. Enter the required parameter name. Give it the value My API board.
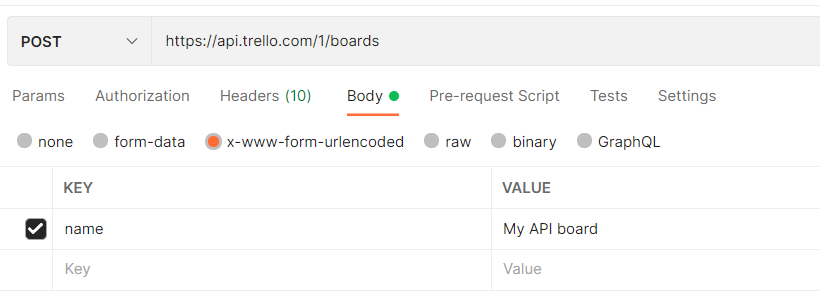
- Click on Send.
- The Body response is invalid key. The status code 401 Unauthorized indicates that we need authorization to invoke the API. This is because when a board is created, Trello needs to associate that board with an account.
- Go to https://trello.com/app-key. The page indicates that you need a key and a token.
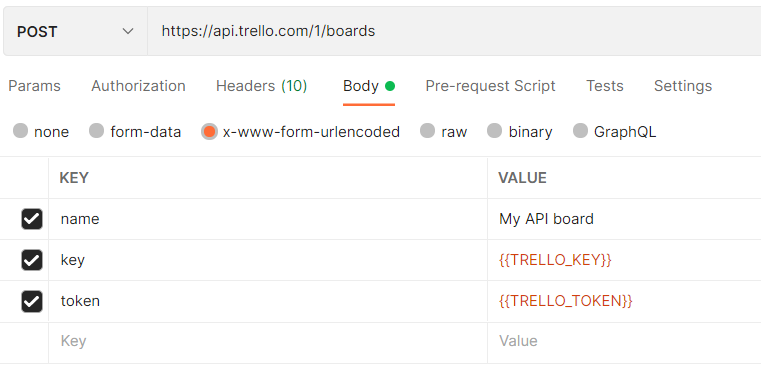
- To add the key information, in the Body tab add a parameter named key whose value is the generated key. You can add a variable named {{TRELLO_KEY}} for the key value as shown below
- To add the token information, click on jeton in the same page and copy the generated token in the Body parameters as shown below.
- Click Save then Send et Voilà you have created your new board. If you go to your trello account, you will see the newly created board.
- The created board contains default lists. Create a new empty board.
Creating Tests
- Let's write an API test for the previous request. Go to the tests tab. The most basic and simple test is to check for the status code as shown in the previous lab.
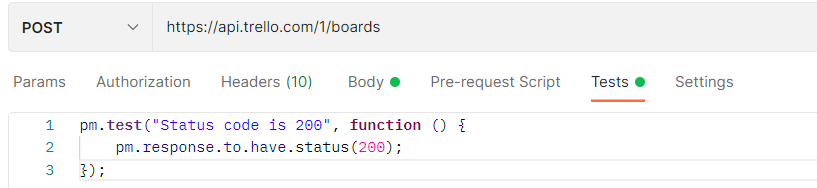
- click Send and check the test results tab. If the test passes, you should see PASS, status code is 200. If not, it means that the test fails and that your request did not return a 200 status code.
